Hello World in C#, A Starting WinForms Example
This article is a short tutorial on creating the most basic application for Windows in C#. A Windows Forms (WinForms) Hello World application. This C# WinForms beginners tutorial assumes that Microsoft Visual Studio is installed and ready to start a new project. The free Community version is used here and Visual Studio Code can be used for C# programming. Note: Based on experience Microsoft Visual Studio works best on a PC with an i3 or better processor, Solid State Disk (SSD) for the hard drive, 6GB+ of memory, and running Windows 10 or later.
The Hello World program is usually the first program tried when new computers or software are tried out. Here a C# WinForms Hello World example is given. (The same steps are similar for a Visual Basic Hello World application.) With Visual Studio open use the File menu and select New then Project.
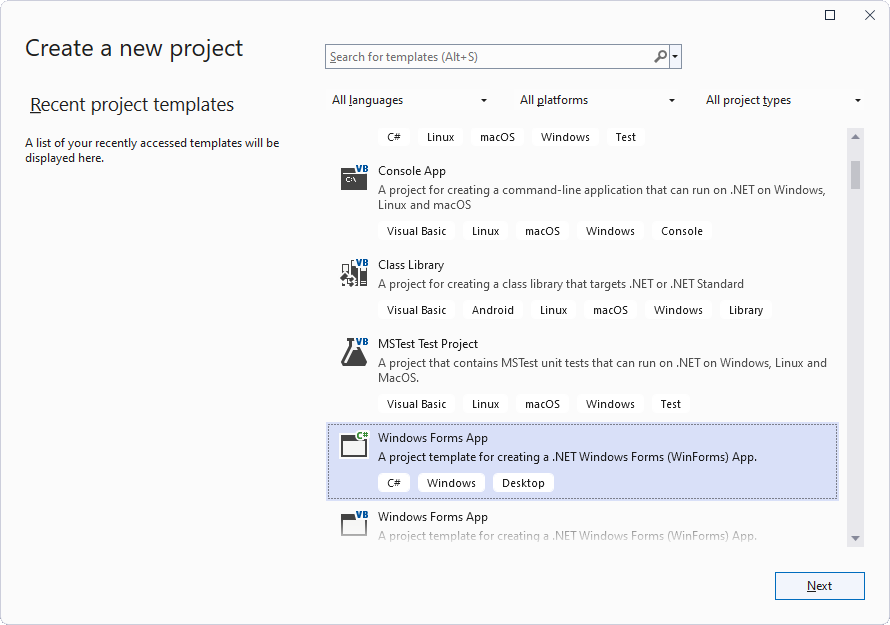
Select the Windows Forms App for C# Windows Desktop. Windows Forms is commonly known as WinForms and provides a building block for writing applications for Windows based computers. WinForms based apps, using the Windows Application Programming Interface (API), have been around for many years, therefore WinForms is widely supported.
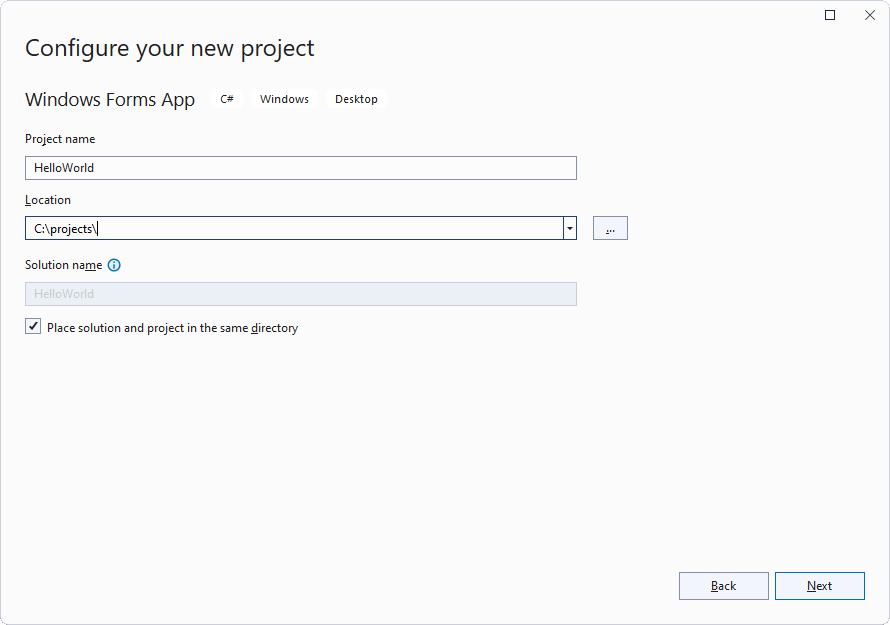
Click Next and the project a name, here it is called HelloWorld. Select a different directory for the project if needed.
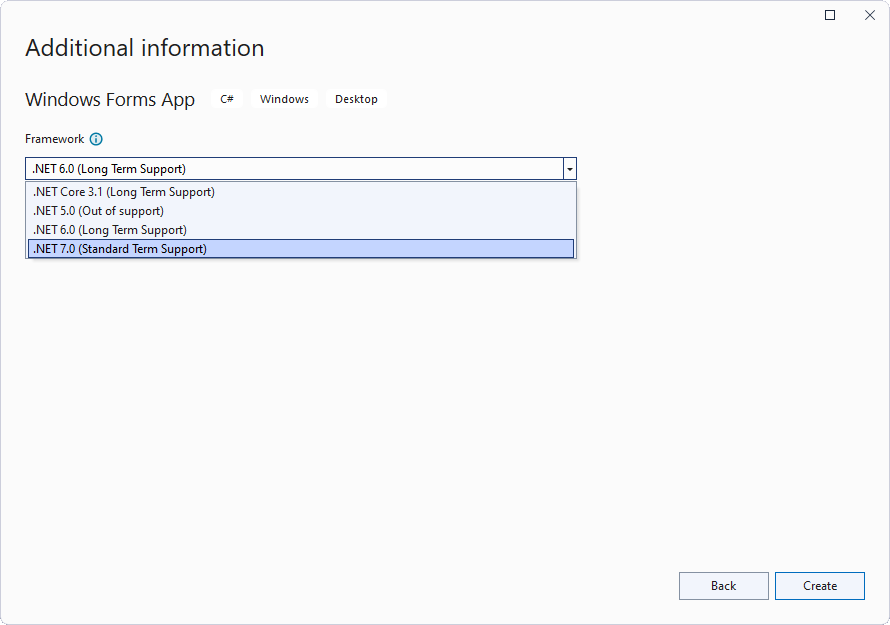
Use the selected version of .NET, or the latest version, and click Create.
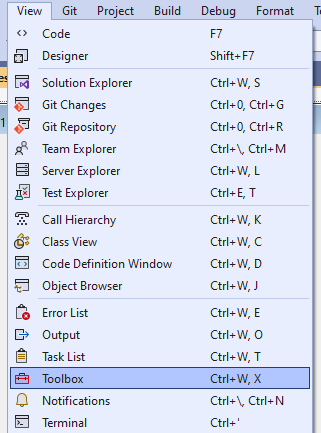
Once everything is loaded a blank Window call Form1 is shown. To add the Hello, World! message to the Window a Label is added from the Toolbox. If the Visual Studio Toolbox is not open use the View menu to open it. (The pin icon on the Toolbox window can be use to keep it visible at all times.)
From the Visual Studo Toolbox drag and drop a Label onto the form.
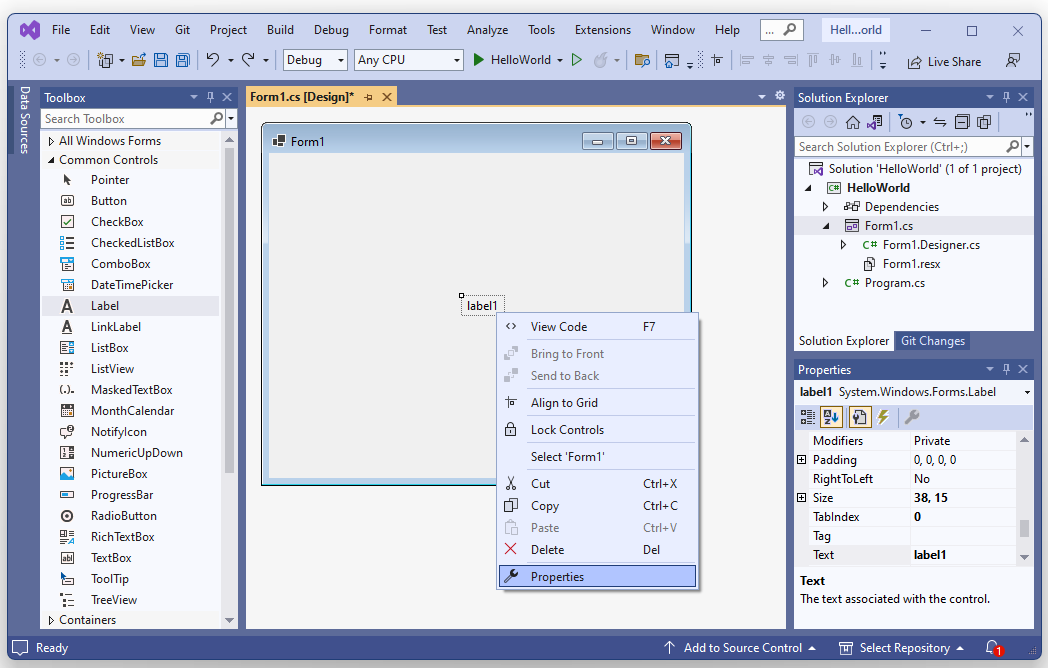
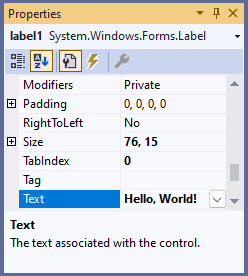
Using the list of label1 Properties change the label text to Hello, World!. The Properties for the label can be accessed from the context menu (normally right-click on the label). Alternatively, access the Properties from the View menu.
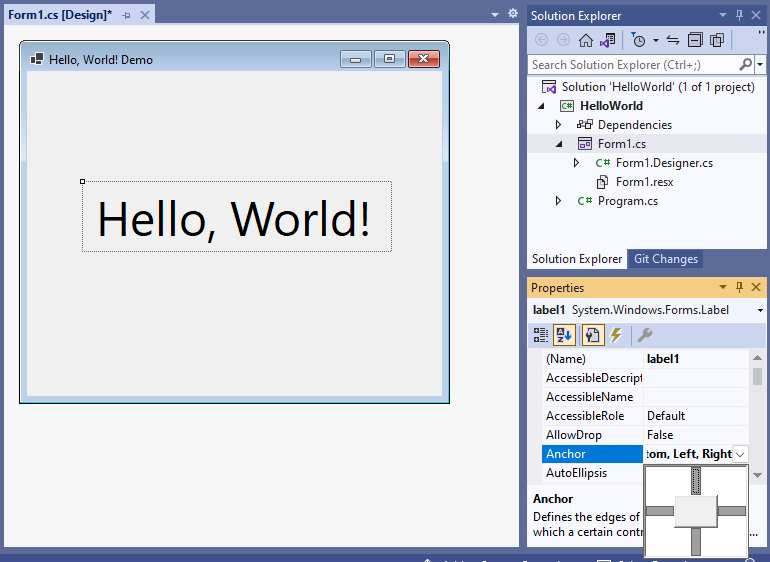
Change other properties if required, e.g. the size of the font (make it bigger), and the anchoring (Anchor) to keep it centred. Use the mouse to move the label to the desired position. To change the title of the Windows form, click on the form and change the Text property (from Form1 to the required title).
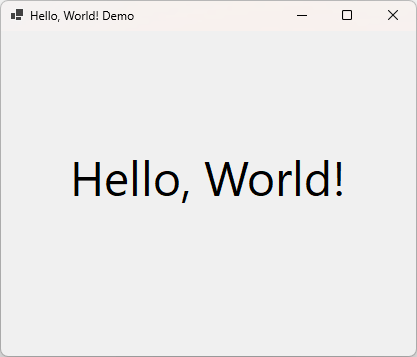
This simple C# Hello World example app does not need any additional code. To run the application click the start button on the toolbar (the green play button), or press F5. To learn more see the Microsoft Visual Studio documentation.
See Also
- Visual Studio Documentation
- View the Tek Eye full Index for other articles.
Comments
On 30th December 2020 at 15:38pm Vikas said: Good example to create Hello World in a Windows app, if anyone needs a console application example, check Hello World C# program with explanation of code, Thanks.
Author:Daniel S. Fowler Published: Updated:


