Web Server on Windows with IIS
Testing websites on your Windows computer? Do you need a web server on Windows 10? Most versions of Windows (Home, Pro, etc.) can run a webserver. The Windows Features app allows the default Microsoft web server, called Internet Information Services (IIS), to be turned on (installed). IIS can also be turned off (uninstalled) in the Windows Features app. The steps to turn on IIS in this article also apply to older versions of Windows, e.g. Windows 7, though the details may vary. Note, if installing several web technologies on to a machine then the Microsoft Web Platform Installer is a good option for setting up IIS.
Open the Windows Features App
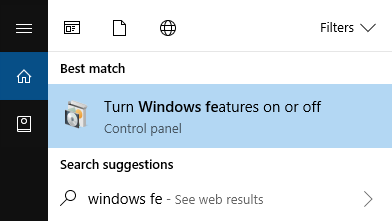
To start the the Windows Features app type Windows Features in the Windows search box and select Turn Windows Features on of off. It can also be accessed from Programs and Features from the Settings. If not logged in as a Computer Admin you will need to provide the admin password.
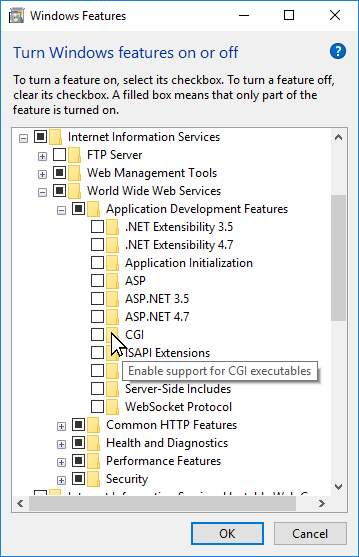
Select Internet Information Services, the default options will be fine for testing normal web pages (HTML, CSS and JavaScript). More advanced web technologies may required additional IIS components installed. For example CGI to run PHP: Hypertext Preprocessor scripts on the server. If in doubt try the default settings first and do research to see what other IIS components you may need.
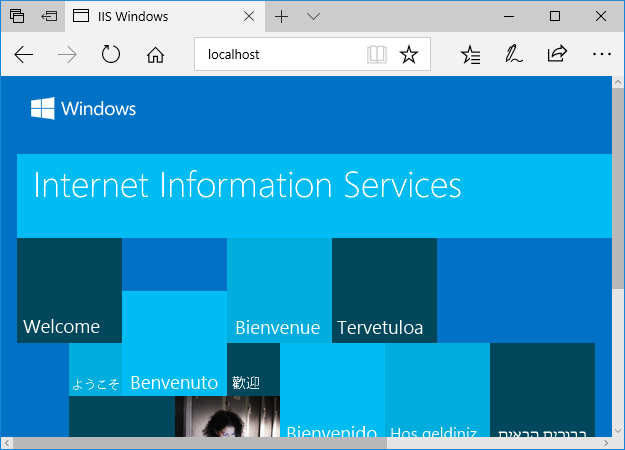
With IIS installed the default web server name for the local Windows computer is localhost. Open the web browser and type localhost, or http://localhost into the address bar. The default IIS homepage will display (as shown at the top of this article).
How to Host a Website in IIS in Windows
The following steps are required to set up IIS to server up a website to a browser.
- Create a folder on the computer to hold the web content, this is known as the virtual directory.
- Define the website in IIS using IIS Manager via Control Panel (admin access required).
- Give the account (IUSR) that runs the website access to the virtual directory, by using the folder properties.
The folder to hold the website is created using File Explorer. The website can then be defined in IIS.
How to Open IIS Manager in Windows
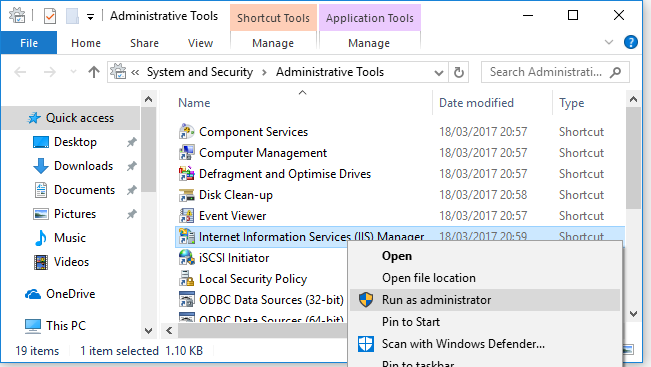
To start IIS Manager type IIS in the Windows search box, or access it via Administrative Tools from System and Security in Control Panel. IIS Manager needs to run under a Computer Admin account. If not logged in as an admin use the context menu (normally right-click) to select Run as administrator and enter the admin password.
Define a New Website in IIS
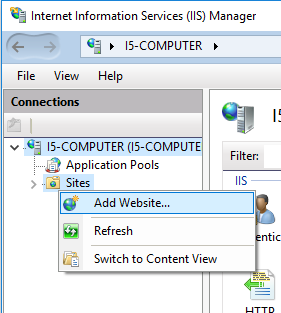
With IIS Manager open use the context menu on the Sites option on the left hand side. Select Add Website.
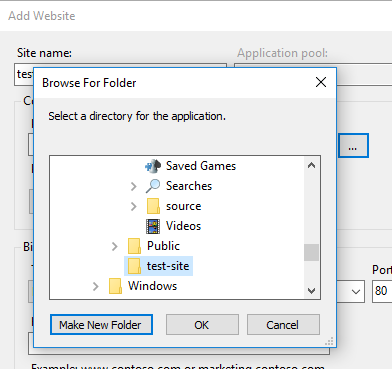
Set the website details in the Add Website dialog. If the folder for the website has not been created use the browse button to set the Physical path. This is also known as the virtual directory. Why is it called the virtual directory? Because the name of the directory is not typed into the browsers address bar to load the content. Instead IIS gets the content based on the IIS website configuration. As far as the web browser is concern it knows nothing about the physical path, only the virtual address, which is localhost.
Here the physical folder for the website is called test-site, but any name can be used.
Give the website a configuration Site name, here the name matches the folder that will contain the content. The folder name and site name can be different, however, that can cause confusion. So here the Site name is also set to test-site.
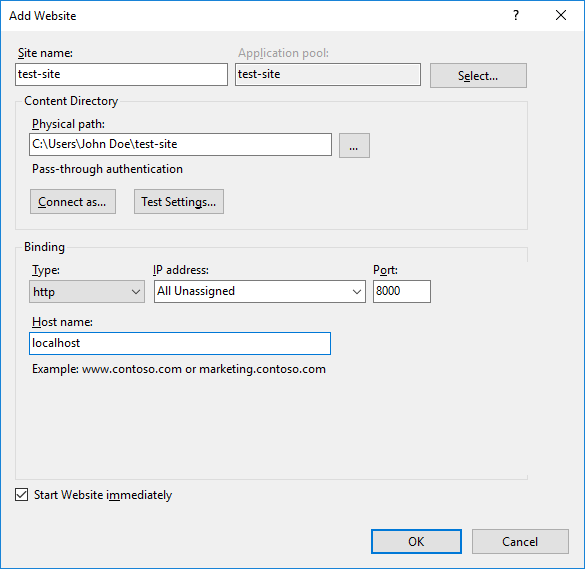
The Host name is set to localhost for testing websites on the local machine. The port is set to 8000 to prevent a conflict with normal web browsing on the local machine. The port number is added to the end of the localhost address. Any port number can be chosen. There are 60000ish port numbers available, some have special meanings, and some will be in use by Windows. To list the ports that Windows is using run the command netstat -an in a Command Prompt (type command in the Windows search box to find the Command Prompt app). To run the website add the port number to the end of the localhost address, e.g. for the port number 8000 the address for the new IIS website is http://localhost:8000.
Set IIS Permissions for Local Website
The folder for the website content must be allowed to be accessed by the correct IIS account. Otherwise the website contents cannot be picked up by IIS and sent to the browser. The browser will show HTTP Error 401.3 - Unathorized.
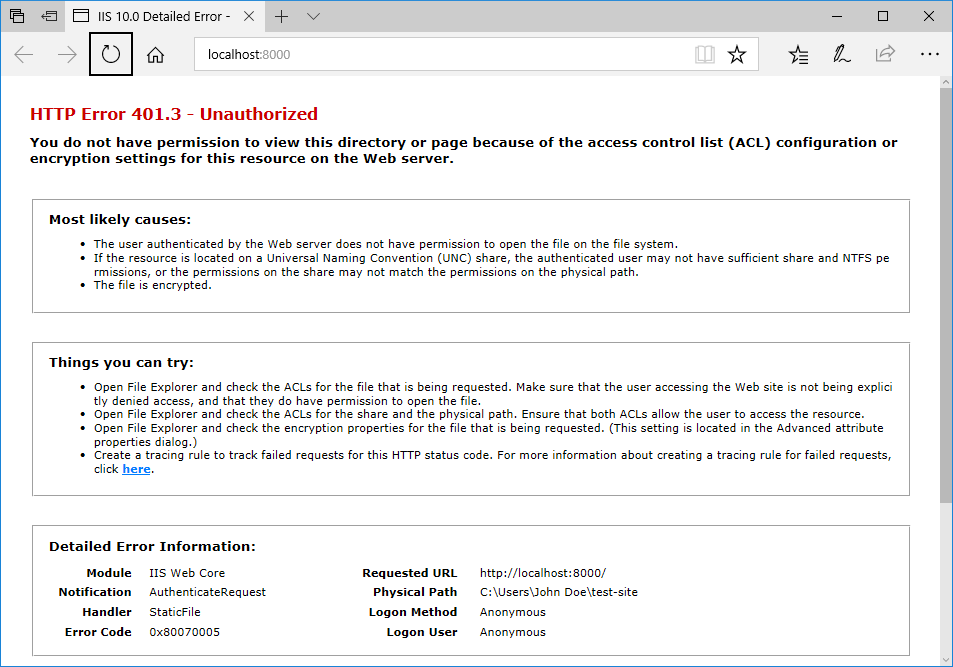
To set the correct persmissions for IIS to access the content in the website's folder (virtual directory), either uses IIS Manager or File Explorer to open the website folder's Properties dialog.
- In IIS Manager highlight the website in the Sites folder on the left hand side and select the Edit Permissions link at the right hand side.
- In File Explorer bring up the context menu on the folder and select Properties.
On the Security tab select Edit. The Permissions dialog opens, select Add.
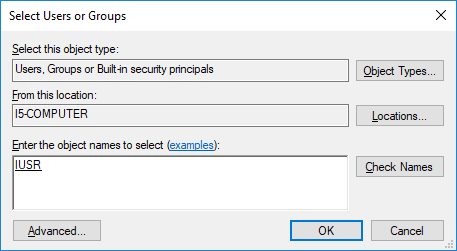
In the Select Users or Groups dialog, enter IUSR in the Enter the object name to select box. Press the Check Names button. IUSR will be underlined if the check was successful.
Add the Website Content for IIS to Serve
With IIS installed, the website folder configured, and the IIS user given permission to read it, the website is ready to be accessed. Start by adding a basic HTML test page to the website. Using a simple text editor, e.g. Windows Notepad or Notepad++, copy this basic HTML page and save it in the website folder as index.html (e.g. saved in test-site folder).
<!DOCTYPE html>
<html>
    <head>
        <title>Basic Web Page</title>
    </head>
    <body>
Hello World!
    </body>
</html>
Now open the browser and enter the address localhost:8000, or http://localhost:8000.
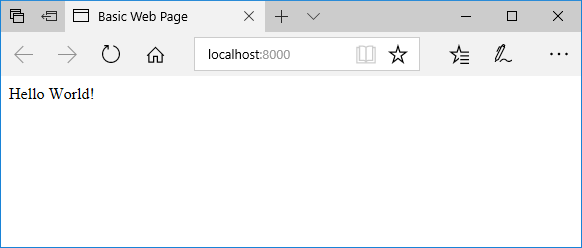
The website is now ready for other content, e.g. create another web page called again.html in the same folder:
<!DOCTYPE html>
<html>
    <head>
        <title>Another Basic Web Page</title>
    </head>
    <body>
Hello Again!
    </body>
</html>
Now browse to it with localhost:8000/again.html (http://localhost:8000/again.html).
See Also
- There are other web servers that can be installed on Windows, for example Apache.
- Install PHP on Windows with Web Platform Installer
- For a full list of all the articles in Tek Eye see the full site Index.
Author:Daniel S. Fowler Published:


