Free Android Icons Using OpenClipArt.org and Paint.NET
When an Application (App) is nearly ready for release thought turns to the tasks to get it ready for the Google Play marketplace. One of those tasks is to provide a good icon. The icon will usually be the first graphical representation of the App that a user encounters on Google Play. It will represent the App as a shortcut (launcher icon) on the Apps screen and in Settings. A good icon helps the initial impression of the App and helps with getting it to stand out from the crowd. The icon must appear professional. Developers sometimes struggle to produce good graphics, the lucky few with access to a graphical artist, either professionally or through friends, or are good artists themselves, will have finer control on the graphics within their App. However, there are many who find that doing the graphics in an App is a chore. This tutorial shows how to easily generate a good Android launcher icon.

Using Android Studio's Image Asset Tool
One option is to use Studio's built in Image Asset utility. This is a tool that makes it easy for a new launcher icon to be generated. However it does not provide much finesse. It is good for a basic icon, stop gap designs, internal company Apps or as placeholders. Another option is required for a more professional looking complex icon.
![]()
Producing a Better Icon
If you have a lack of time or expertise to make an good icon there are plenty of free clipart and graphics resources available from the Internet. For example the Open Clip Art Library is a great source for free graphics that can be adapted for icons (and other App uses). The 100,000 images are provided in scalar vector graphic (SVG) format. This makes them great for scaling to icon size. Once a suitable graphic has been chosen it needs to be converted into an Android compatible icon. A graphics program is used to add a border, resize and save to the Portable Network Graphics (PNG) format. There are high quality free tools available for this image conversion, such as GIMP, Inkscape or Paint.NET (Windows only).
For this tutorial use any App project available, your own or one from Android Example Projects. Here a simple Hello World App (Your First Android Java Program) is used. If you are new to working with the graphical resources of an Android App you may want to get familiar with some concepts and get an overview of the various types of assets that an App will require. Take a look at the Android design web pages and the pages on multiple resolutions and icons at the Android Developers site.
Find a Good Starting Image
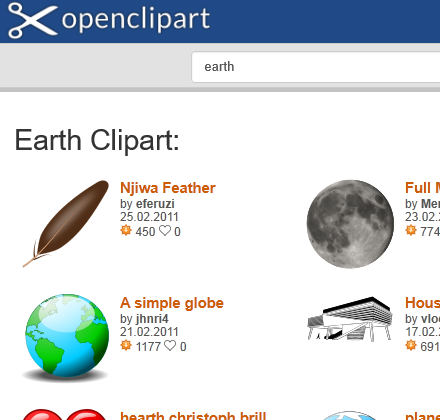
First find a suitable free graphic as a starting point. Go to https://openclipart.org/ and use the Search Openclipart box. The search results that appear may include graphics that do not always appear logical. This is because the search not only includes the name of the graphic, but also tags, descriptions, partial words, misspellings or terms in a different language. Thus graphics apparently unrelated to the search text may appear, though this also means that occasionally a useful unexpected graphic will be found. Page through the thumbnail search results which have extra info (title, contributor, submission date, number of downloads). Here the search term earth was used.

When looking for a graphic to use as an icon there are some pointers to keep in mind:
- The graphic will be scaled down dramatically, so not too much detail, the search thumbnail is a good indicator.
- Clear and simple designs with smooth lines and bright, neutral colors will scale well and look good on a screen.
- Keep in mind Android design guidelines.
- Icons are square, so look for an image that if bounded by a square it would fill most of that square.
Several pages into the search results a graphic titled A simple globe contributed by user jhnri4 was chosen. Click on the graphic to bring up its details. The SVG graphic can be saved to the local machine using the Download button. For an icon a PNG is required. Fortunately Open Clip Art has an option to obtain a PNG file. In the PNG box a resolution is entered which is the width of the PNG to create (with the height calculated to maintain the correct aspect ratio).

Android Icon Sizes
What resolution is required to generate an Android launcher icon? Android icons need to be provided in at least five different sizes, six if supporting older low density displays. These different sizes are to allow Android to display the best possible icon for the device's screen density. It is recommended that an App supplies the correct sized icons to prevent poor icons being displayed on some devices. If an icon for a given density is not available it is scaled from another size. The icon sizes are:
- 36 by 36 pixels for low density displays (approx. 120 dpi)
- 48 by 48 pixels for medium density displays (approx. 160 dpi)
- 72 by 72 pixels for high density displays (approx. 240 dpi)
- 96 by 96 pixels for extra high density displays (approx. 320 dpi)
- 144 by 144 pixels for extra extra high density displays (approx. 480 dpi)
- 192 by 192 pixels for extra extra extra high density displays (approx. 640 dpi)
There is also a border to take into consideration, the border area allows for icon spacing and image overrun (when most of the image is in a square area with a small part extending outwards, as shown with the handle in this shopping icon):
![]()
A recommended border is one twelfth of the icon width. This means that the practical image size for the icon graphic is smaller than the stated icon size, i.e. without a border images should be approximately:
- 30 by 30 pixels for low density
- 40 by 40 pixels for medium density
- 60 by 60 pixels for high density
- 80 by 80 pixels for extra high density
- 120 by 120 pixels for extra extra high density
- 160 by 160 pixels for extra extra extra high density
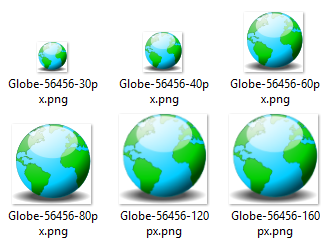
In the box next to the PNG button type in the image size required, e.g. 80 for the extra high density icon. We cannot put in the icon size, 96, because the Open Clip Art conversion does not add a margin, that will be added later. Click on the PNG button and the image will download. Do the same with the other values to generate the other sized images.

(With openclipart.org occasionally generating the next graphic fails. The download will produce a copy of the previous size graphic. If this happens refresh the page, using F5 on a PC. If refresh does not clear the problem restart the browser. Another error that may occur is a selected graphic failing to convert to PNG. This can be due to corrupted or incorrect SVG mark-up, the browser displays an error. In this case choose another image, or download the SVG file and use an application that supports SVG, such as Inkscape, to generate the PNG. Alternatively on the image's Open Clip Art page bring up the context menu on the graphic and save it as a large PNG, it can then be resized in a graphics application and the transparency reset).
Adding Icon Borders
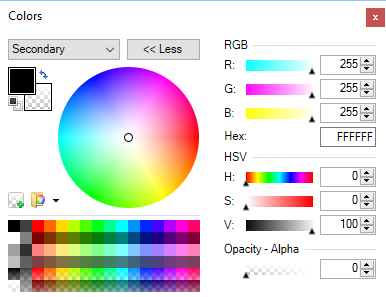
For all six sizes there will be six files containing the image at the different resolutions. The images may not be square, especially if tall or wide images are chosen, this can be dealt with when the border is added. Here Paint.NET is used to add a border and make any minor adjustments required. Open the first graphics file. The secondary (background) color needs to be set to transparent. This is done with the Colors dialog, if not open click the colors icon in the top right (or press F8). On the Colors dialog ensure that Secondary is selected in the drop down. Then click the More button to see the advanced options. Set the Opacity - Alpha option in the bottom right to zero.

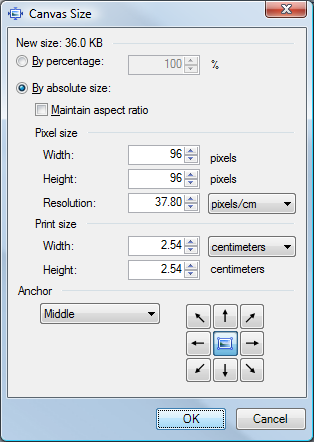
Next open the Canvas Size dialog by using the Image menu option and selecting Canvas Size (or press Ctrl-Shift-R). Select the By absolute size radio button, uncheck Maintain aspect ratio. In the Pixel size options set the correct Width and Height for the icon for the given graphic:
- Set Width and Height to 36 for the 30 by 30 image.
- Set Width and Height to 48 for the 40 by 40 image.
- Set Width and Height to 72 for the 60 by 60 image.
- Set Width and Height to 96 for the 80 by 80 image.
- Set Width and Height to 144 for the 120 by 120 image.
- Set Width and Height to 192 for the 160 by 160 image.
Set the Anchor option to middle.

Select OK to perform the resize and save the resized image. Repeat for the other graphics.
![]()
The files need to be copied into the project where the icons are to be used. If using Studio then it is likely that under res there are already folders for icons. A folder for each density icon will be required. Under res add the missing folders. Copy the created PNG files into the folders. Delete the existing ic_launcher.png images then rename the new files to ic_launcher.png:
- Put the 36×36 PNG into the res/mipmap-ldpi folder.
- Put the 48×48 PNG into the res/mipmap-mdpi folder.
- Put the 72×72 PNG into the res/mipmap-hdpi folder.
- Put the 96×96 PNG into the res/mipmap-xhdpi folder.
- Put the 144×144 PNG into the res/mipmap-xxhdpi folder.
- Put the 192×192 PNG into the res/mipmap-xxxhdpi folder.
(The icon file does not need to be called ic_launcher.png. It can have another name as long as all the launcher icon files in all the mipmap folders have the same name. For example the icon files could be called globe.png. If the file name is changed then the manifest file would need to know the new name. The AndroidManifest.xml file would be opened, then in the application element android:icon="@mipmap/ic_launcher" would become android:icon="@mipmap/globe".)
![]()
This article has shown how a set of launcher icons can be easily create for free with Open Clip Art Library images. Other drawables can also be created in a similar way. The icons generated for this tutorial are available for download. Take a look at the article Android Launcher Icons Using Inkscape to see how to create icons from scratch using the free Inkscape program.
![]()
List of Android PNG Icon Sizes
| Folder | Icon Size | Image Size | dpi | Density | Scaling Factor | Example Screen |
|---|---|---|---|---|---|---|
| mipmap-ldpi | 36×36 | 30×30 | 120 | ldpi | 0.75 | QVGA |
| mipmap-mdpi | 48×48 | 40×40 | 160 | mdpi | 1 | HVGA |
| mipmap-hdpi | 72×72 | 60×60 | 240 | hdpi | 1.5 | WVGA800 |
| mipmap-xhdpi | 96×96 | 80×80 | 320 | xhdpi | 2 | WXGA720 |
| mipmap-xxhdpi | 144×144 | 120×120 | 480 | xxhdpi | 3 | Nexus 5 |
| mipmap-xxxhdpi | 192×192 | 160×160 | 640 | xxxhdpi | 4 | Nexus 6 |
Remember always mention the artist/creator of any image that you use, even if it is in the public domain. We all feel better when we know we have helped someone. Your App's About Box is a great place to do that. Always respect the artist's rights and abide by their license. In this case thanks Open Clip Art Library contributor jhnri4 for the Simple Globe graphic.
See Also
- Android Launcher Icons Using Inkscape
- Pingback: Four Links About Android Icons Worth Checking Out | rm core
Author:Daniel S. Fowler Published: Updated:


