Opening Pre-Android Studio 3 Projects
The Android Operating System (OS) is constantly evolving due to bug fixes, security updates, new Android versions and features, and support for new hardware. This means updates to the Android Software Development Kit (SDK) and the Android Studio Integrated Development Environment (IDE) happen often.
Each release or update to Android Studio brings changes that can affect existing projects. These changes can affect the build tools, Gradle based build system configuration, the Studio IDE, and the installed libraries. This can impact previous projects. This may mean that a project that opened, built and ran in a previous version of Studio now shows error messages and may fail to build in a newer version of Studio. This article gives some help in fixing issues that occur when opening previous Android projects in a new version of Android Studio.

Update: Android Studio is now on version 4 and later, some of the issues in this article no longer apply. This article is retained for archive purposes only.
Checking the Studio Status Bar
Tip: When Android Studio is performing an action on a project the bottom status bar will show messages. This is useful to see if an action is being performed and you need to wait for it to finish before continuing.

Gradle Project Sync Failed
When opening an old Studio project it will have been configured with a previous version of the Gradle build tools. Studio may display a message:
Gradle project sync failed. Basic functionality (e.g. editing, debugging) will not work properly.

The Studio Messages screen (selected using the bottom tabs above the bottom status bar) will contain a link to fix the problem. If no link exists it will just display a minimum supported Gradle error message:

If so press the Try Again link first:

The Messages tab will then display a link:
Fix Gradle wrapper and re-import project Gradle settings

Click the link and watch the bottom status bar for progress.
An Android SDK Build Tools error message may display. See the next section on resolving that error.
Removing buildToolsVersion from build.gradle
The Studio Gradle build tools now default to a specific version. Therefore, the build.gradle for the app does not need the buildToolsVersion line. A message will displayed to indicate this:

To fix this message delete the buildToolsVersion line from the app's build.gradle file. The project can then be synced with the updated build.gradle. Use the Sync Project with Gradle Files option under Android from the Tools menu.
Viewing Installed Build Tools Versions
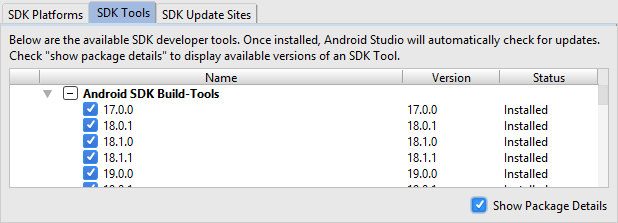
To see the build tools installed use the SDK Manager, opened via the toolbar icon.

Use the SDK Tools tab and the Show Package Details check box to see the Build Tools versions installed.

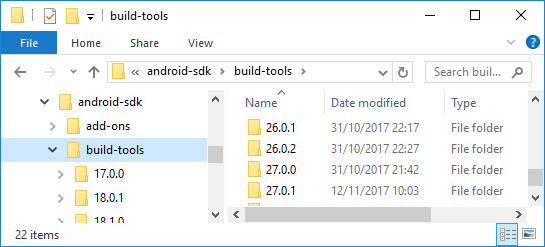
This is reflected in the build-tools directory under the Android SDK install location.

Manifest Merger Failed Error, Change SDK Version Numbers
Opening projects in newer versions of Studio may require updates to the minSdkVersion, targetSdkVersion and compileSDKVersion settings. If libraries drop support for older versions of Android then minSdkVersion will need to be increased. For example, at the time of writing Admob for Android only supports Android API 14 (Ice Cream Sandwich) and later. This means minSdkVersion would need setting to 14 at least. Likewise to support new Android Oreo (API 26) features the targetSdkVersion and compileSDKVersion is set to at least 26.
The minSdkVersion, targetSdkVersion and compileSDKVersion are changed in the app's build.gradle file (in the app directory in the project tree). Again use the Sync Project with Gradle Files option under Android from the Tools menu when the SDK version values are changed.
Updating Dependencies
An app may need to link to a newer version of a library, e.g. the Android Support Library. If the version number of a library is increased in the dependencies section of the app's build.gradle file then a Failed to resolve error may be displayed:

Click the Add Google Maven repository and sync project link in the error message for the project to get the updated dependency. A minimum supported Gradle error may be seen after an update from a repository. Clicking the Gradle update link and re-syncing Gradle should resolve that error.
Gradle Sync Message
When opening a project after a Studio update, Studio may display the message: Gradle settings for this project are not configured yet.

Click OK for Studio to automatically perform the Gradle configuration.

See Also
- See some Android Studio example projects to learn Android app programming.
- For a full list of the articles on Tek Eye see the full site Index
Author:Daniel S. Fowler Published: Updated:


