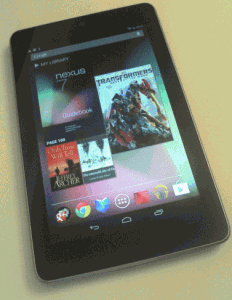
Nexus 7 ADB Driver from ASUS Required When Debugging Your App
Update: The Nexus 7 tablet has been out of production for some time. Therefore this article has been archived and is only available for historical use.
When using Windows to develop apps for the Nexus 7 using the Eclipse IDE (or Android Studio), the tablet may not be seen in the Android Device Chooser dialog when the Run button is pressed.

Why ADB is not Listing The Nexus 7 Tablet
This is because the Android Debug Bridge (ADB), which runs in the background as adb.exe, cannot communicate with the Nexus device. This short article runs through several possible causes, starting with the most likely reason.

The ASUS Nexus 7 ADB Driver is Required
Having installed the Android SDK the default Google USB driver is not used for Nexus 7 debugging. Instead the ASUS Nexus 7 ADB driver for Windows must be installed. If you open Windows Device Manager, via Control Panel and System (or in Windows 8.1 and later type device manager at the Start screen), Nexus 7 will be listed with a small yellow exclamation mark. This indicates a driver is not correctly installed.

The SDK Manager program, installed with the Android SDK, has the option to install the Google USB Driver, normally done by default. (If not run SDK Manager.exe and when it has refreshed the list of packages scroll to the bottom. In the Extras folder select Google USB Driver and click the Install Packages button.) However, for the Nexus 7 ADB Driver, it is not installed via SDK Manager. It must be installed separately.
ASUS Nexus 7 Windows Driver Installation Instructions
To install the Nexus 7 ADB driver for Windows first download the driver from the Asus support pages at https://www.asus.com/Tablets/Nexus_7/HelpDesk_Download/. Click Android or Others for OS and then the USB Download link. The Nexus 7 ADB Driver file is called usb_driver_r06_windows.zip. Extract (copy) the contents of this zip file to a new empty folder on your PC. Open the Nexus 7 device properties in Window’s Device Manager (double-click) and select the Update Driver button. Browse and select the folder with the extracted driver files. The driver will be installed and the Nexus 7 listing in Device Manager will change to Android Phone and Android Composite ADB Interface. The Nexus 7 should now be available to select when an app is executed in Eclipse or Studio.
Checking Other Nexus 7 Developer Settings
The Nexus 7 USB Debugging options are available from the notifications area when you plug the tablet into the computer. Pull down from the left side of the notification area and select the USB debugging entry. If USB debugging is not enabled it will need to be turned on in Settings. Access settings by pulling down on the right notification area and selecting settings (or go into all the installed apps from the home screen and find Settings). Scroll to the bottom and select Developer options (if not visible see next paragraph), then check USB debugging.
Enabling Nexus 7 Developer Options in Settings
Developer options may not be visible under settings. To make it visible select the About Tablet entry in Settings. In the About tablet screen find the Build number at the bottom of the list. Tap the build number several times (about 7). After about three taps a message appears and counts down, when it reaches zero the Developer options will have been enabled, press the back key to see the new option in Settings.
Switch Nexus 7 USB Connection Modes
Some developers have needed to switch the USB computer connection mode from Mobile device (MTP) to Camera (PTP) to get the Nexus 7 detected by ADB. In Settings select the Storage option. Select the menu at the right hand of the notification area, then select USB computer connection. Change the connection option.
Other Solutions
If the Nexus is not being seen on the USB port and the PC has been rebooted try another port. Ensure that any third-party apps that may use the Nexus 7 USB port are not running or have been removed. Finally try searching online help forums such as Stack Overflow, https://stackoverflow.com/.
See Also
- For a full list of the articles on Tek Eye see the full site Index.
Author:Daniel S. Fowler Published: Archived:


