About Box in Android App Using AlertBuilder
The venerable About Box, whatever the Operating System (OS), whatever the program, the chances are it has an About option. (See Wikipedia for more background.) The About Box is useful for support:
Hello, there is a problem with my application?
Hi, can you press About and tell me the version number?

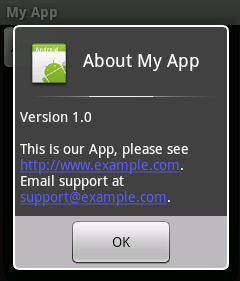
Even websites have an about page. Since the About Box is likely to be required again and again it is worth having a ready made About Box class that can be easily added to any new app that is developed. As a minimum the About should display a dialog with a title, e.g. About My App, the Version Name from the manifest, some descriptive text (loaded from a string resource) and an OK button. This tutorial presents the code for an About Box class that can be dropped straight into any app.

(This Android About Box tutorial assumes that Android Studio is installed, a basic App can be created and run, and the code in this article can be correctly copied into Android Studio. Obviously you can change the example to meet your requirements. When entering code in Studio add import statements when prompted by pressing Alt-Enter.)
For this tutorial a new project was started in Android Studio called My App using an Empty Activity, all other entries for the Create New Project wizard being left at their default values.
Change App Version in Android Studio
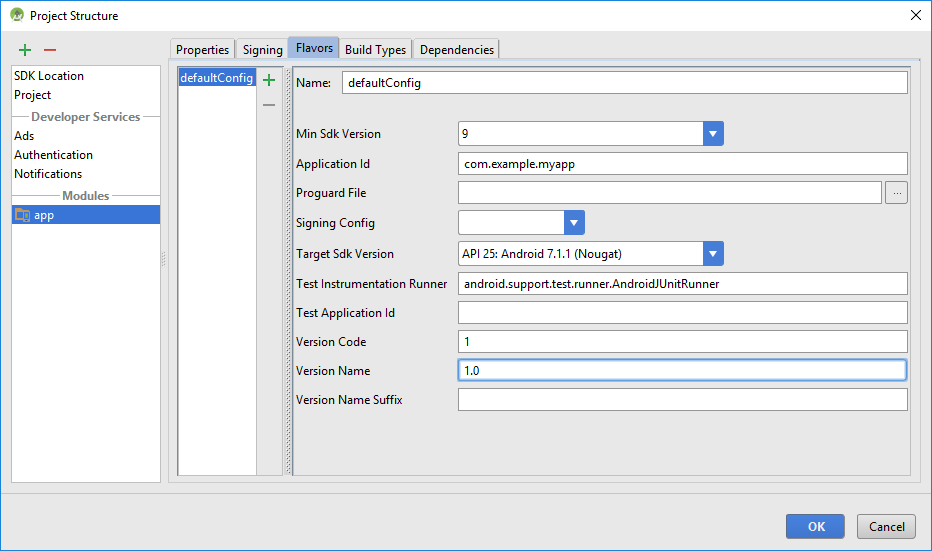
For a new Android Studio project the app versionName, a string attribute, is defaulted to "1.0". This is stored in the app's build.gradle file, so to is the app's internal verisonCode integer attribute (default is 1). Change app version in Andriod Studio using the Flavors tab in the Project Structure dialog. In the File menu select the Project Structure option, or use the key combination Crtl-Alt-Shift-S. With the Project Structure dialog open select the Flavors tab and change Version Name and Version Code as required.

Read App Version in Android Java Code
Version name can be read using the PackageInfo class. PackageInfo is obtained from PackageManager which itself is available from the app's Context. Here is a method to read an app's versionName string.
static String VersionName(Context context) {
    try {
        return context.getPackageManager().getPackageInfo(context.getPackageName(),0).versionName;
    } catch (PackageManager.NameNotFoundException e) {
        return "Unknown";
    }
}
The PackageManager can throw a NameNotFoundException (for when the class is used to find information on other packages). In this example the exception is unlikely to occur, here it is just consumed by returning an error string. The above code can be changed to return the versionCode setting. To do so swap versionName for versionCode and return an integer from the function.
How to Build a Reusable About Dialog for Your Android Apps
With an AlertDialog.Builder and its methods an About Box can be put together quickly. It can be enhanced using the Android Linkify class and a custom layout. With Linkify the About text any URLs (such as app help pages on the web) and email addresses (useful for a support email link) can be made clickable.
Start by creating a new custom layout. Highlight the app or the res/layout folder in the Project explorer. Use the context menu (usually right click), or the File menu, and select New then XML and Layout XML File. For Layout File Name enter aboutbox, use ScrollView for the Root Tag and click Finish.
With aboutbox.xml open in Design mode set the ScrollView ID to aboutView using Properties. Drop a horizontal LinearLayout on to the screen from the Layouts options in the Palette. Set the LinearLayout's layout_width and layout_height to match_parent, the ID to aboutLayout, and padding to 5dp (use the View all properties option to change padding). Add a TextView to the LinearLayout from the Widgets Palette. (It may be easier to drop the TextView on to the LinearLayout using the Component Tree.) For the TextView set the layout_width to wrap_content and layout_height to match_parent, the ID to aboutText, and the textColor to @android:color/white. The XML code for the layout should resemble the following (use this code if required):
<?xml version="1.0" encoding="utf-8"?>
<ScrollView xmlns:android="http://schemas.android.com/apk/res/android"
    android:id="@+id/aboutView"
    android:layout_width="match_parent"
    android:layout_height="match_parent"
    android:padding="5dp">

    <LinearLayout
        android:id="@+id/aboutLayout"
        android:layout_width="match_parent"
        android:layout_height="match_parent"
        android:orientation="horizontal">

        <TextView
            android:id="@+id/aboutText"
            android:layout_width="wrap_content"
            android:layout_height="match_parent"
            android:layout_weight="1"
            android:text="TextView"
            android:textColor="@android:color/white" />
    </LinearLayout>
</ScrollView>
A ScrollView is required for when the About text is long and the screens are small. Another advantage of the custom layout for the About Box text is that the look of the text can be modified (here set to white with a little padding).
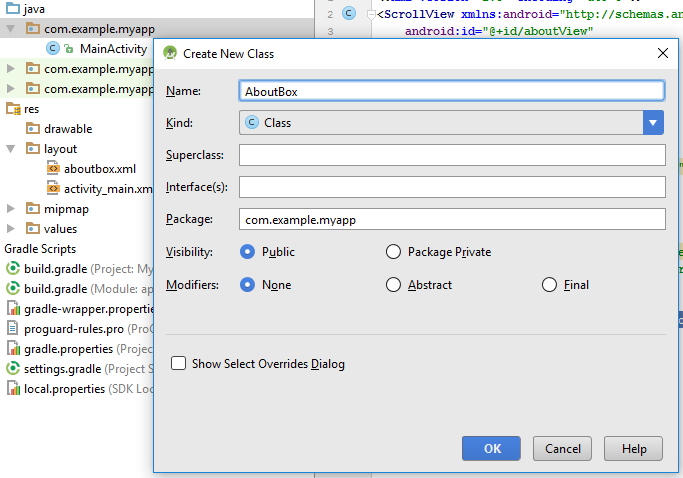
In the Project explorer select the same folder as MainActivity (or whatever name you used). Use the context or File menu to select New then Java Class. In the Name field enter AboutBox and click OK.

The About Box class uses a Spannable to hold the text which can then be passed to Linkify via the TextView in the custom layout. The layout is inflated, the About text set and then AlertBuilder.Builder is used to create the dialog. In the AboutBox.java file replace the AboutBox class with this class code (change the package name if you have used your own name):
package com.example.myapp;

import android.app.Activity;
import android.content.Context;
import android.content.pm.PackageManager;
import android.support.v7.app.AlertDialog;
import android.text.SpannableString;
import android.text.util.Linkify;
import android.view.InflateException;
import android.view.LayoutInflater;
import android.view.View;
import android.view.ViewGroup;
import android.widget.TextView;

public class AboutBox {
    static String VersionName(Context context) {
        try {
            return context.getPackageManager().getPackageInfo(context.getPackageName(),0).versionName;
        } catch (PackageManager.NameNotFoundException e) {
            return "Unknown";
        }
    }
    public static void Show(Activity callingActivity) {
        //Use a Spannable to allow for links highlighting
        SpannableString aboutText = new SpannableString("Version " + VersionName(callingActivity)+ "nn"
                + callingActivity.getString(R.string.about));
        //Generate views to pass to AlertDialog.Builder and to set the text
        View about;
        TextView tvAbout;
        try {
            //Inflate the custom view
            LayoutInflater inflater = callingActivity.getLayoutInflater();
            about = inflater.inflate(R.layout.aboutbox, (ViewGroup) callingActivity.findViewById(R.id.aboutView));
            tvAbout = (TextView) about.findViewById(R.id.aboutText);
        } catch(InflateException e) {
            //Inflater can throw exception, unlikely but default to TextView if it occurs
            about = tvAbout = new TextView(callingActivity);
        }
        //Set the about text
        tvAbout.setText(aboutText);
        // Now Linkify the text
        Linkify.addLinks(tvAbout, Linkify.ALL);
        //Build and show the dialog
        new AlertDialog.Builder(callingActivity)
                .setTitle("About " + callingActivity.getString(R.string.app_name))
                .setCancelable(true)
                .setIcon(R.drawable.ic_launcher)
                .setPositiveButton("OK", null)
                .setView(about)
                .show();    //Builder method returns allow for method chaining
    }
}
Notice that the app's icon can be shown in the About Box title using setIcon(R.mipmap.ic_launcher). String resources for the app's name and About Text are required in the usual res/values/strings.xml, like this:
<resources>
    <string name="app_name">My App</string>
    <string name="about">This is our App, please see http://www.example.com. Email support at support@example.com.</string>
</resources>
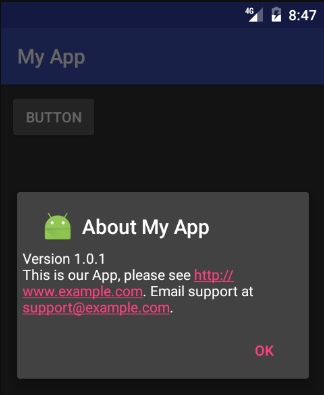
Showing the About Box requires only one line of code. Drop a button on to the first app screen then add the code shown here on a button click (an import for View is required):
package com.example.myapp;

import android.support.v7.app.AppCompatActivity;
import android.os.Bundle;
import android.view.View;

public class MainActivity extends AppCompatActivity {

    @Override
    protected void onCreate(Bundle savedInstanceState) {
        super.onCreate(savedInstanceState);
        setContentView(R.layout.activity_main);
        findViewById(R.id.button).setOnClickListener(new View.OnClickListener(){
            public void onClick(View arg0) {
                AboutBox.Show(MainActivity.this);
            }
        });
    }
}
To reuse this About Box drop the aboutbox.xml into a project's res/layout folder, add a new class called AboutBox, replace the class code with the AboutBox class code above. Then just call AboutBox.Show() from a button or menu click passing in a Context. Web address and email addresses highlighted in the text when clicked invoke the browser or email client.
Download some example code in aboutbox.zip from this article ready for importing into Android Studio. See the instructions in the zip file, alternatively the code can also be accessed via the Android Example Projects page. An earlier version of this article was produced for the Android Cookbook.
Archived Comments
Andre on April 23, 2013 at 8:02 pm said: When I place the source in my button it says: AboutBox cannot be resolved. How to fix it?
Tek Eye on April 24, 2013 at 12:40 pm said: Is the AboutBox class in the same package as the Activity? Both source files should have the same package name at the top of the file. If not you will need to import the About box package, or prefix it with the full package name. Also check that there are no errors in the AboutBox class. If the class has errors it will not compile and will not be resolved in the main class. Download working code from our Android Example Projects page.
Author:Daniel S. Fowler Published: Updated:


