Android 9 Patch Image Files for Buttons and Borders
When designing a User Interface (UI) you may want to change the default View backgrounds to give an app its own look. In most cases the backgrounds must be able to scale correctly for different size screens on a variety of devices. Android uses Nine Patch files to provide support for scaling of backgrounds as View sizes change.

In the following image the word Text has a background that is a rounded rectangle (a black border with a grey background). The rectangle has then been uniformly scaled to fit in Longer Text. As a result of scaling the corners and vertical edges have distorted to give the rounded rectangle an unbalanced look. Compare that to the second Longer Text where the background has maintained its balance.

To correctly scale the background selected parts of the image are scaled in a particular direction or not scaled at all. Which parts are scaled and in which direction are shown in this diagram.
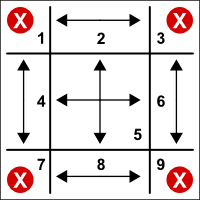
The X indicates that corners are not scaled, the vertical edges are scaled vertically, the horizontal edges are scaled horizontally and the central area is scaled in both directions. This is probably why it is called a Nine Patch file, a.k.a 9patch.
- 4 Corners +
- 2 Vertical Edges +
- 2 Horizontal Edges +
- 1 Central Area
- = 9 Areas (Patches) in Total
(This Android 9 patch tutorial assumes that Android Studio is installed; a basic App can be created and run; and code can be correctly copied into Studio. For this test App the Application name is called Nine Patch and an Empty Activity is used. You are free to change this example for your own requirements.)
Button and Image Borders in Android with 9 Patch Images
In the example project that follows the background of an EditText is replaced with a solid turquoise background with black border. The required rounded rectangle is drawn in a graphics program, such as Gimp or Paint.NET. In the picture below Inkscape has been used to create a 32x32 pixel background that will be used for the nine patch file, transparency is shown here as a checkerboard.
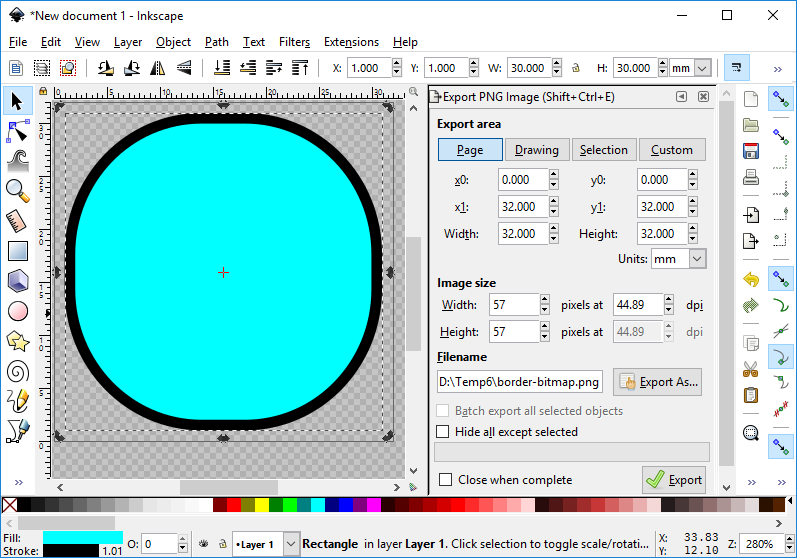
The rectangle is made as small as possible (almost resembling a circle) to support small Views. The 32x32 pixel image exported from Inkscape has a one pixel border and transparent background.

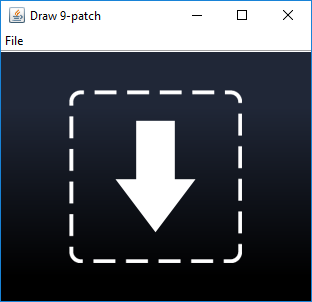
Android needs to know which proportion of the vertical and horizontal edges need to be scaled, and where the View content sits in relation to the background. These factors are determined from indicators drawn within the image. To apply these indicators the draw9patch program supplied in the Android SDK tools folder is used. Start the program (in Windows run draw9patch.bat) and open the background image (or drag and drop onto the draw9patch dialog).
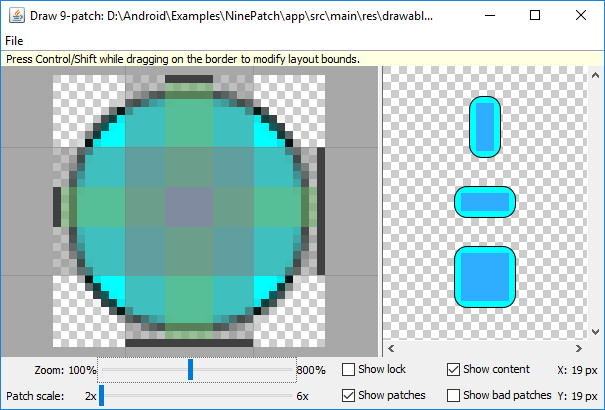
The draw9patch program will expand the image by one pixel all around. It is on this extra one pixel edging that indicator lines are drawn. Enlarge the image using the Zoom slider. In the left hand and top edges draw the indicator lines to mark which of the vertical and horizontal pixels can be duplicated for scaling. In the right hand and bottom edges draw the indicator lines to show where content can be positioned. Use the check boxes to help visualise the effects of the nine patch scaling.
Save the marked file in the res/drawable folder for a project. Android determines if an image is scaled using Nine Patch scaling instead of uniform scaling via the file name, it must have .9 before the .png file extension. For example an image file originally named turquoise.png would now be named turquoise.9.png. To reference the image as the background for a View use the background attribute, as in android:background="@drawable/turquoise". In the following image a Plaintext (an EditText) has been dropped on to the default Empty Activity from the Palette. The background is then set to the Nine Patch file generated as above.
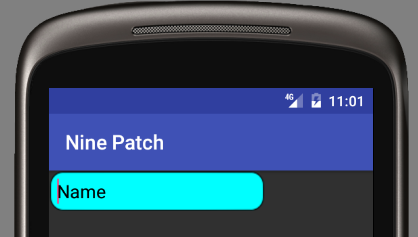
To indicate focus for keyboard support combine the image with another one in a selector file (similar to the selector file in the tutorial ImageButton Graphics with Inkscape Example). Here an orange version of the background rectangle is drawn to support focus indication.

The bitmap is changed to a Nine Patch file as before and saved to turqfocus.9.png in the res/drawable folder. The selector XML file (here as selector.xml) is then saved in the same res/drawable folder:
 <!--?xml version="1.0" encoding="utf-8"?-->
<selector xmlns:android="http://schemas.android.com/apk/res/android">
    <item android:state_focused="true" android:drawable="@drawable/turqfocus"/>
    <item android:drawable="@drawable/turquoise"/>
</selector>
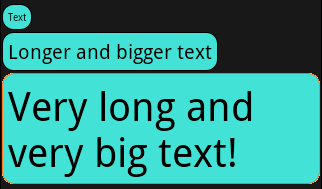
Reference it as android:background="@drawable/selector" (see the tutorial ImageButton Graphics with Inkscape for another selector file example). In the following example EditTexts with the nine patch background create above are shown with different text sizes.
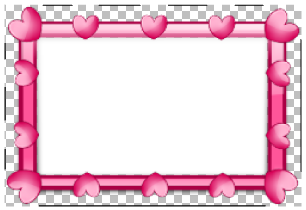
Nine Patch files are not restricted to simple View backgrounds. This Nine Patch file is used to frame a photograph. The left and top scaling indicators are spaced where detail that must not be scaled is located. Here it is the small hearts that must not be scaled otherwise they will be distorted.
Download the example project code in ninepatch.zip for this tutuorial ready for importing into Android Studio. See the instructions in the zip file. The zip file can also be accessed via the Android Example Projects page. A version of this article was produced for the Android Cookbook.

Summary
- Generate or obtain the bitmap that will be scaled as a View background.
- Open the bitmap in the draw9patch program.
- The bitmap is automatically expanded with a one pixel border.
- Add the indicator lines for content placement and unscaled area on the new one pixel border.
- Save the new bitmap in the res/drawable folder for the project with a .9.png extension.
- Reference the new Nine Patch bitmap from the background attribute of a View.
The pink heart frame used in this article was derived from an image from the Open Clip Art Library.
Archived Comments
dapple on February 5, 2014 at 1:47 am said: Thanks, this is a really good intro to patch 9.
ankit on April 18, 2014 at 9:44 am said: Thanks for sharing this nice tutorial.
Author:Daniel S. Fowler Published: Updated:


