Export Android Studio Project
The quick answer on exporting an Android Studio project to a zip file is that you need to look in the File menu, then Managing IDE Settings, and then Export to zip file. Those who want more background and tips then this article will help.
Google's Integrated Development Environment (IDE) for developing Android apps is Android Studio, based on IntelliJ. Studio manages an apps source code and the project build files. If required, the project and code can be exported for transfer to another development machine, or for backup purposes.

Why Export an App from Android Studio?
Occasionally an app needs to be moved between PC's, or archived safely, there can be several reasons for this, including:
- Handing development over to a new programmer.
- Moving code to another computer or development environment.
- Distributing demo, example and training source code to a wide audience.
- Keeping code safely stored elsewhere.
- Taking a project snapshot for backup or escrow, or other legal reasons.
The most common way to share code is to use some form of version control system (VCS), a.k.a. source code management (SCM) system, with the Git system being extremely popular. Alternatively, manually copying code, maybe in a zip archive format (which is widely supported). Some IDE's, for example Eclipse, support export options that allow project files (or a subset of files) to be exported as a zip archive. That zip file can then be imported into another Eclispe IDE. Does an export project option exist for Android Studio? Studio does support an export project option, however, there are some considerations.
Android Studio's Three Export Options
There are three export options in Studio, bit only one is used for code export:
- The export option directly under the File menu is used to export the code and project files to a HTML format, useful for documentation.
- Under File and Manage IDE Settings there is Export Settings. This allows any customised Android Studio settings to be preserved in a zip file. These can be imported into another Studio to keep preferred settings.
- Again, under Manage IDE Settings there is the Export to zip file, this option exports the project from Studio.
Export to Zip File Option
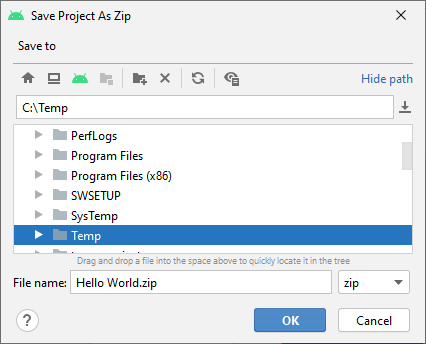
Option 3 is the one that will place all the build files and source code into a zip file, and you can choose the location for the zip file and change the zip file name from the default (which is the project name).

The zip can be stored safely away for archival purposes, or used on another computer that has Android Studio.
Redundant Files in a Zipped Studio Project
The Tek Eye article Android Project Structure provides a brief overview of the default files generated in a Studio project for an Android app. This allows an understanding of why certain files are in the zipped project file, and why some files are not included. Likewise, the content of the .gitignore files in a project will indicate which files are not core to a project. This is because Git uses the .gitignore files to determine what files should not be placed into the Git storage. For a default app created in Studio, as a minimum the following files are likely to be in the exported zip file:
- build.gradle - The Gradle build files in the various project directories.
- settings.gradle - App build settings.
- gradle.properties - The Gradle properties file.
- gradlew.* - The Gradle script files.
- .gitignore - The Git ignore file in the various project directories.
- proguard-rules.pro - The settings for the ProGuard code optimizer functionality in the app directory.
- app/src - The apps source code folder.
- app/libs - The folder for additional library files.
- gradle - The Gradle wrapper folder.
Removing Redundant Studio Project Files
However, in some cases, some of the above files do not need to be in a code archive zip file. The source code is the most important part of the project. Therefore, a reduced zip file containing only source code could be produced for archival or distribution purposes. Removing the redundant files from the project can be done before the project is exported from Studio.
Items 4 to 6 may not be required. If no libraries are in the project then item 8 can be removed as the directory will be empty. Thus, from Studio's Project explorer:
- Delete all .gitignore files, including the ones in any subdirectories, e.g. in app (if not using Git for source control).
- Delete the gradlew and gradlew.bat script files if not using command line builds.
- Delete the libs folder.
The src directory in the default app folder is where the source code for the project exists, but other source code folders can exist. Furthermore, the app folder can be renamed (refactored). By default everything in app/src/main would be needed in the zip file. However, not everything in the app/src folder may be required:
- test - This folder, in src, can be excluded if the app has no unit tests written.
- androidTest - This folder, in src, can be excluded if the app has no instrumentation tests.
- proguard-rules.pro - If no rules have been added to the default file then it is not required (item 6 above).
If both the test directories are removed edit the build.gradle file in the app folder to remove the testImplementation and androidTestImplementation dependencies. Likewise if the proguard-rules.pro file is removed edit the same build.gradle to remove the reference to it. Doing all of the above means a minimum zip archive will have:
- The app/src directory (minus the files and directories discussed above).
- The gradle directory
- The build.gradle files (one in the top level project directory, and one in the app directory).
- The gradle.properties file
- A settings.gradle file.
Here is a default build.gradle file for a simple Hello World app directory before removing redundant files and the references to them:
plugins {
    id 'com.android.application'
}
android {
    compileSdkVersion 29
    defaultConfig {
        applicationId "com.example.helloworld"
        minSdkVersion 16
        targetSdkVersion 29
        versionCode 1
        versionName "1.0"
        testInstrumentationRunner "androidx.test.runner.AndroidJUnitRunner"
    }
    buildTypes {
        release {
            minifyEnabled false
            proguardFiles getDefaultProguardFile('proguard-android-optimize.txt'), 'proguard-rules.pro'
        }
    }
    compileOptions {
        sourceCompatibility JavaVersion.VERSION_1_8
        targetCompatibility JavaVersion.VERSION_1_8
    }
}
dependencies {
    implementation 'androidx.appcompat:appcompat:1.2.0'
    implementation 'com.google.android.material:material:1.2.1'
    implementation 'androidx.constraintlayout:constraintlayout:2.0.4'
    testImplementation 'junit:junit:4.+'
    androidTestImplementation 'androidx.test.ext:junit:1.1.2'
    androidTestImplementation 'androidx.test.espresso:espresso-core:3.3.0'
}
A Hello World app build.gradle file after removing the unit and instrumentation test files, and ProGuard file:
plugins {
    id 'com.android.application'
}
android {
    compileSdkVersion 29
    defaultConfig {
        applicationId "com.example.helloworld"
        minSdkVersion 16
        targetSdkVersion 29
        versionCode 1
        versionName "1.0"
    }
    buildTypes {
        release {
            minifyEnabled false
            proguardFiles getDefaultProguardFile('proguard-android-optimize.txt')
        }
    }
    compileOptions {
        sourceCompatibility JavaVersion.VERSION_1_8
        targetCompatibility JavaVersion.VERSION_1_8
    }
}
dependencies {
    implementation 'androidx.appcompat:appcompat:1.2.0'
    implementation 'com.google.android.material:material:1.2.1'
    implementation 'androidx.constraintlayout:constraintlayout:2.0.4'
}
Android Studio Move Project to Another Computer
When creating a zip file Studio will put all the files that are needed to replicate the project in another version of Studio. For an app created within Studio, that includes the source code, the Gradle build files, and any libraries used. To import the project on another computer first extract the files on the destination computer. Studio will not move any folders or files, therefore, ensure the project is extracted to the required location.
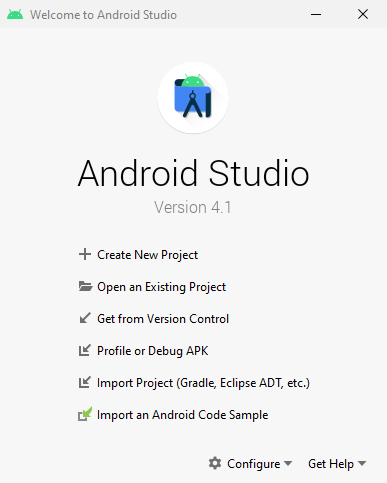
On the other computer use Studio's File then Open menu option to load the transferred project, or the Open an Existing Project or Import Project options on the Welcome screen (to return to the Welcome screen close any open projects).

From the open or import dialog select the extracted directory to open the project. Wait for Studio to configure the project. Studio will add local files for settings. Watch the status bar at the bottom of the Studio screen to see Studio's status. The project is now ready for editing and running in Android Studio.
Possible Unable to Update Error
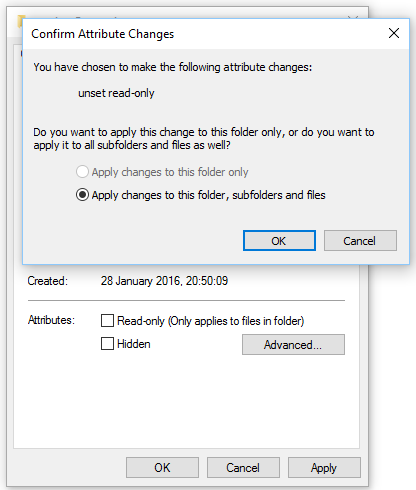
When importing a project into Studio you may see an unable to update error and a Unexpected Error dialog displays. This may be due to write protected files, or on Windows, files that have the mark of the web. Remove the read only attribute for write protected files, or unblock a file. On Windows use the context menu on the project directory (normally right-click). Then select Properties and clear the Read-only check box (or unblock the file). Click Apply and confirm attribute changes with Apply changes to this folder, subfolders and files selected.

See Also
- For more information on the files found in an Android project see the article Android Project Structure.
- To remove a project from Studio see the article Delete a Project in Android Studio IDE.
Author:Daniel S. Fowler Published: Updated:


