CAN Interface for USB with PCAN, Software and Demo
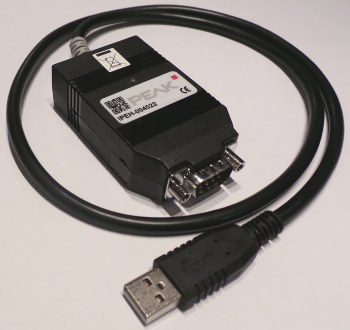
This article is a tutorial on accessing the PEAK-System PCAN-USB CAN interface from C# code. The PEAK-System PCAN-USB adapter is an established product that comes with drivers and example code. That code was the inspiration for a C# software library to allow for quick integration into a .NET project. A download of the library to interface to the PCAN-USB adaptor is provided, along with a demo program.
A Brief Introduction to CAN
The Controller Area Network (CAN) is a digital data bus used to transfer sensor readings and actuator values between computers and microcontrollers in many types of systems. It was invented by Bosch for use in cars but is now used in other transport systems, buildings and factory automation. Its popularity is due to its simplicity (just two wires), lowcost and reliability. The data speed is low by todays standards, commonly up to one megabit per second (1 Mb/s). Five hundred kilo bits per second (500 kb/s) is often seen in vehicles. For long cable lengths low speeds are required (less than 125 kb/s). For links to detailed resources on the CAN protocol, and information on CAN bus wiring see the article CAN Bus Wiring Diagram, a Basics Tutorial.

The PEAK-System hardware CAN interface, the software that PEAK provides, and the library provided here, means that a .NET app is easily connected to a CAN bus. Whilst lower cost USB to CAN interfaces are available, the support from PEAK and the performance of their products means they are widely used.
The PEAK-System PCAN-USB Interface Wiring
The PCAN adaptor comes with a standard USB connection for attaching to a laptop or desktop computer. The connection to CAN is via a 9-way D-type plug. The pinouts match the common CiA 303-1 specification. See the CAN Bus Wiring Diagram article. Note, some single board computers and Arduino CAN adapters do not follow the usual CiA CAN wiring. If using the PEAK USB adapter on some of those devices, check the device information to ensure correct wiring. The PCAN-USB manual available from the PEAK-System support page contains information on the PCAN-USB D-type connector. For basic CAN operation the CAN high, pin 7, and CAN low, pin 2 are connected together.
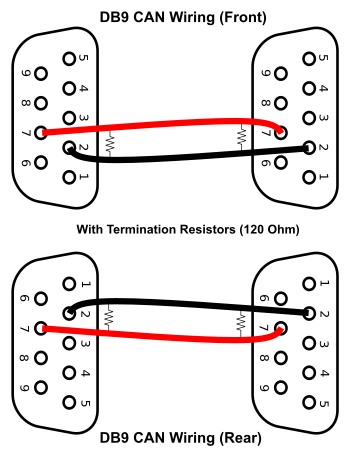
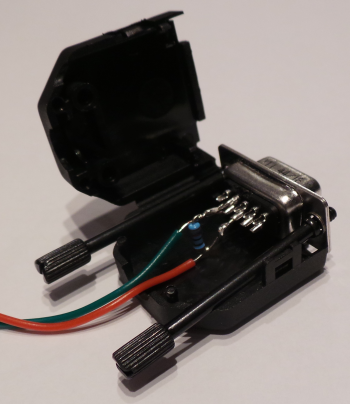
A CAN data bus requires a termination resistor at each end to absorb signal energy. This prevents the signal from reflecting back along the two wires an interfering with subsequent data transmissions. The termination resistance is typically 120 ohms. The PEAK-System PCAN-USB manual has details on enabling the termination internally in the PCAN-USB device.
The PEAK-System PCAN Software
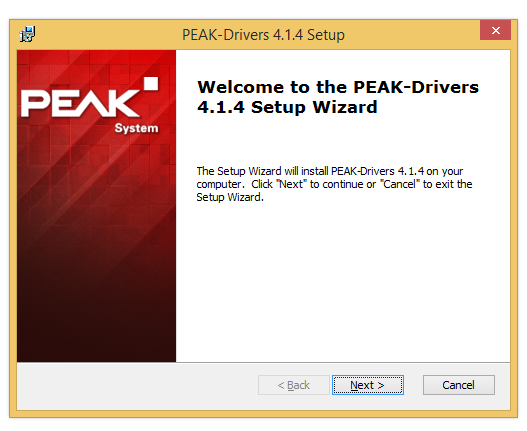
The software for use with the PCAN-USB hardware is available from the PEAK-System web Support area. It includes:
- Windows drivers (installed by running PeakOemDrv.exe from the PEAK-System_Driver-Setup.zip download).
- PCAN-View, a CAN data traffic viewing and data packet transmission program. Good to verify PCAN-USB devices are working and performing basic CAN traffic capturing, viewing and analysis functions. (Copy PcanView.exe from the pcanview.zip download.)
- A variety of Application Programming Interaces (APIs), in the form of Windows DLLs, are available (e.g. XCP, ISO-TP, UDS, etc.). The starting point (as used in the software provided here) is the PCAN-Basic API, accessed via PCANBasic.dll which can be installed with the drivers, or download the pcan-basic.zip.
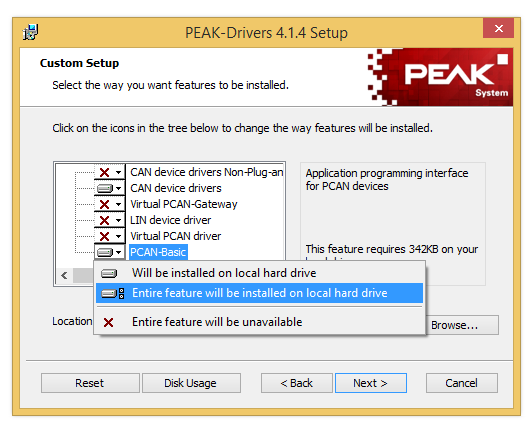
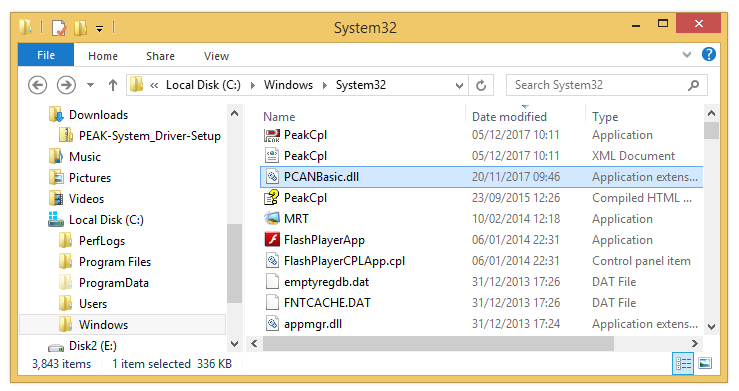
The Peak-System PCAN-USB sample for C# is a WinForms program. Therefore, it shows how to add PCAN-USB support to a C# project. To simplify the process a DLL project has been developed that can be dropped into a .NET solution. The PCAN-USB interface is then accessed via a C# class. This makes the PCAN-USB device immmediately available for use in a new project.
A PEAK-System PCAN-USB Library and Demo
Note: Please consider the software as beta. It is your responsibility ensure that the software will not cause you any issues.
The C# class to interface with PCAN-USB is available from GitHub, in the project called PCAN_for_USB. If you don't want to clone the project (https://github.com/GR8DAN/PCAN_For_USB.git) then it can be downloaded from here as a zip file, or via the GitHub zip file link.
Once the zip file is extracted, or the project cloned, the demo program can be tried. However, it will require the PEAK-System PCAN-USB drivers to be installed, along with the PCANBasic.dll (see above). Another CAN device will be required to form a CAN network. It you have two PCAN-USB devices they can be used to talk to each other.
The Visual Studio solution file is PCAN_For_USB.sln. Open the solution, it should build and run when the Start/Run button is pressed.
PCAN-USB Interface Software Demo UI
The PCAN-USB interface C# class comes with a demo program. The Windows Forms (WinForms) UI demo is called PCAN_USB_UI. If a PEAK-USB hardware adaptor is not plugged into the computer the message Plug in a PEAK PCAN USB Adapter will be displayed. To use the demo program:
- Select the PCAN-USB device from the list of detected devices.
- Select the correct or required baud rate.
- Click the Start button.
- A standard eight byte message can be transmitted, and received messages are displayed.
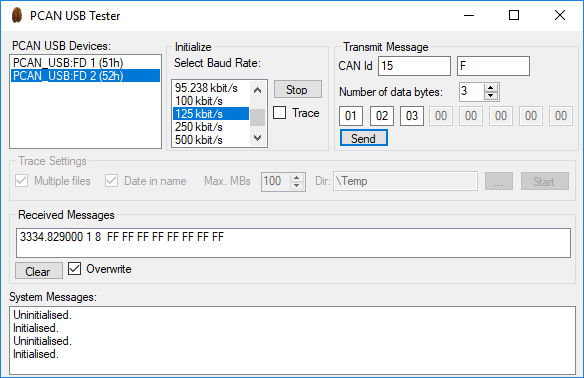
The code for the UI demo should be easy enough to understand, and helps to see how the PCAN_USB class is used.
Reusing the PCAN_USB Class
To reuse the PCAN_USB class add the project to a new solution (or add a reference to the compiled DLL). For example copy the PCAN_USB project to the new solution folder. (It is good practice to change the ProjectGuid.) In Microsoft Visual Studio add the PCAN_USB project to the solution using the Add and Existing Project menu options. Add the reference to PCAN_USB in the project that will using the PCAN_USB class.
The class to interface to the PCAN-USB adaptor is called PCAN_USB, in the CAN.PC namespace:
using System.Windows.Forms;
using CAN.PC;

namespace MyCANProject
{
    public partial class Form1 : Form
    {
        PCAN_USB pCAN;

        public Form1()
        {
            InitializeComponent();
            //Layer between C# program and PEAK interface DLL
            pCAN = new PCAN_USB(this);
        }
    }
}
The plugged in PCAN-USB devices are return with the GetUSBDevices() method:
private void Form1_Load(object sender, EventArgs e)
{
    List<string> PeakUSBDevices = pCAN.GetUSBDevices();
    if (PeakUSBDevices != null)
        listBox1.Items.AddRange(PeakUSBDevices.ToArray());
}
Possible baud rates are provided in a string array:
listBox2.Items.AddRange(PCAN_USB.CANBaudRates);The PEAK-System API uses an unsigned short integer to reference a PCAN-USB device, use DecodePEAKHandle to extract it from the string displayed in the list.
UInt16 handle = 0;  //PCAN handles are ushorts
if (listBox1.SelectedIndex > -1)
    handle = pCAN.DecodePEAKHandle(listBox1.Items[listBox1.SelectedIndex].ToString());
Use WriteFrame to send a CAN message:
private void button2_Click(object sender, EventArgs e)
{
    //Data buffer is a fixed size, here 8 bytes for standard CAN
    //Number of bytes sent determined by a data length code (DLC)
    byte[] data = new byte[8];
    //Set an id (0 to 2047 for standard CAN)
    UInt32 id = 0x7ff;
    //Set the number of bytes to send, here 3 bytes
    int length = 3;
    // Set the data
    data[0] = 0x01;
    data[1] = 0x02;
    data[2] = 0x03;
    //Send a three byte message
    pCAN.WriteFrame(id, length, data);
}
A PCAN_USB class stores the data from a received CAN packet:
public class Packet
{
    //PEAK uses a struct for passing to the PEAK dll
    public ulong Microseconds { set; get; }
    public uint Id { set; get; }
    public byte Length { set; get; }
    public byte[] Data { set; get; }
    //Index for displaying in list boxes
    public int DisplayIndex { get; set; } = -1;
}
Received CAN packets are stored in a PCAN_USB list:
public List<Packet> Packets { get; set; } = new List<Packet>();Use the usual Count for a List to get the number of packets in the buffer:
label2.Text = pCAN.Packets.Count.ToString();Received packets overwrite the last one with the same id, unless it is turned off:
 //Don't overwrite received packets
 pCAN.OverwriteLastPacket = false;
A list box can be updated automatically as packets are received. Note: This feature has not been optimized for performance.
 //Update a list box as packets are received
 pCAN.ReceivedMessages = listBox3;
When finished with a PCAN-USB adaptor call Uninitialize().
private void Form1_FormClosing(object sender, FormClosingEventArgs e)
{
    //Close any open channels
    pCAN.Uninitialize();
}
See Also
- CAN Bus Wiring Diagram, a Basics Tutorial
- PCAN-USB devices loopback test
- For a full list of the articles on Tek Eye see the full site Index
Comments
Huh on 16th March 2022 at 10:52 said: What about GND?
Tek Eye on 17th March 2020 at 13:45 said: CAN uses differential signalling so ground (GND) is not as important, however, it can be used in noisy environments as an additional reference and shielding. See the article Can Bus Wiring Diagram, a Basics Tutorial for the required pins.
Author:Daniel S. Fowler Published:


