Setup CentOS Server for Web Hosting with DVD ISO
CentOS is a popular GNU/Linux Operating System (OS) for server and desktop computers. This is because it is derived from Red Hat Linux which is used in many large organisations. This article is a tutorial on setting up a CentOS server for web hosting using the DVD version of the CentOS ISO download. For the minimal ISO download see the article Install Apache on CentOS to Configure VPS Test System. This tutorial is suitable for a virtual private server (VPS), physical server or virtual machine (VM). Here a VirtualBox VM is used and steps are similar to a VPS or real server install. A VM is useful for testing for a live configuration, allowing for changes to be verified before live deployment.

Download the CentOS DVD ISO
This tutorial uses the CentOS 7 DVD ISO download. CentOS 7 is a 64-bit OS and must be installed on a 64-bit machine (or a 64-bit VM on a 64-bit machine). On the Download CentOS page select the DVD ISO button. Then choose a mirror. The list has only x86_64 ISO because CentOS 7 is 64-bit only, for 32-bit installs use CentOS 6 and the procedure will differ.
If not setting up a VirtualBox VM to run CentOS 7 then skip to the start installation section.
Creating a VM in VirtualBox
VirtualBox is a free program for creating VMs on a variety of OSs and thus great for a setting up test environments, trying and learning new software. This turorial assumes VirtualBox is loaded and running. If not see the article Virtualization Software for Windows. Create a new VM using the New option:

Using the VirtualBox wizard configure the VM's properties, first the name:
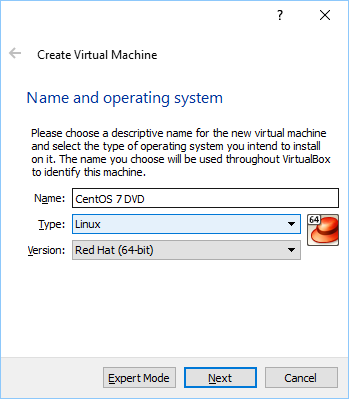
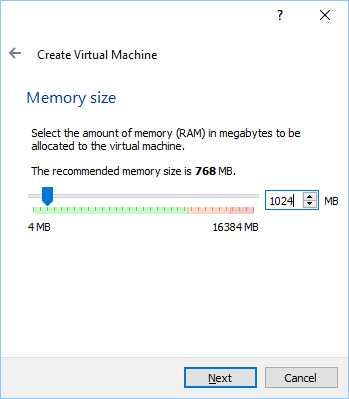
The type and version fields should be set to Linux and Red Hat (64-bit), remember this will only work on a 64-bit computer. Set the memory to 1024MB (1G) as a minimum. Memory is taken from the machine the VM is running on, therefore a machine with plenty of memory is recommended:
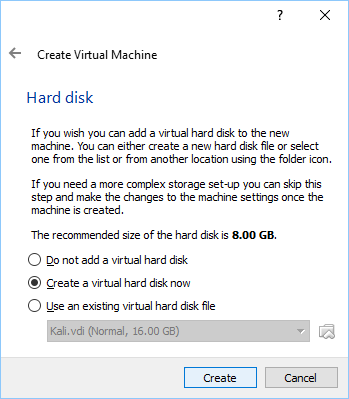
Select the creation of a hard disk for a new VM:
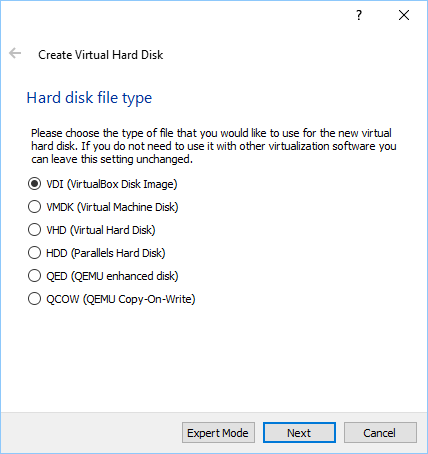
Use the default VDI format for the hard disk unless the created image will be used by other VM programs:
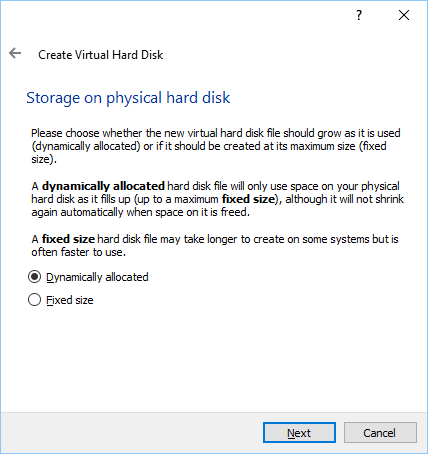
A dynamically allocated hard disk saves on storage space on the real computer:
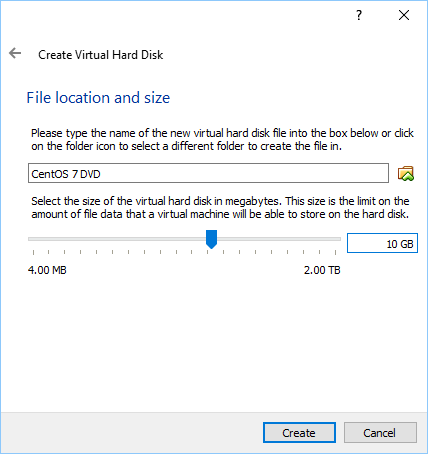
A minimum of 10 GB is recommended for the hard disk, bigger if testing websites with lots of data:
Once the VM is created attached the ISO DVD as a virtual CD. Use the Settings option for the VM:

Select storage and browse to the ISO file download via the small CD icon:

With the ISO selected close the settings and Start the VM. The VM will boot and start the installation:
Start the CentOS 7 Installer
When the installer starts select Install CentOS 7 and press return, no need to test the media for a new VM:
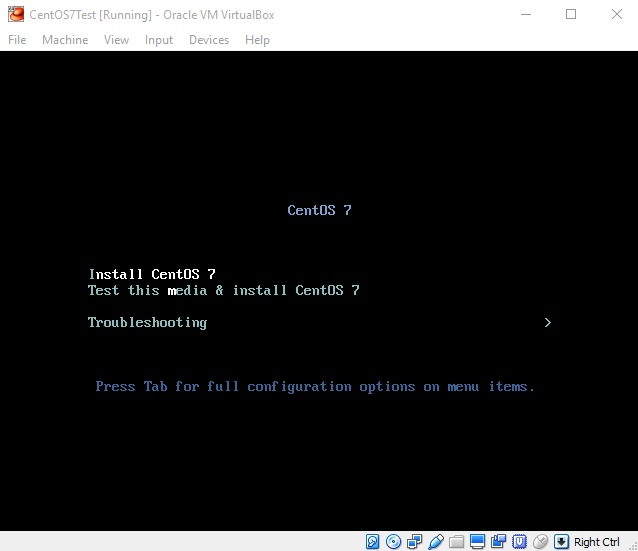
When use a VM the PCs mouse pointer may be captured by the VM. To release the mousepointer for a VirtualBox VM press the right control key (as indicated in the VM's bottom status bar).
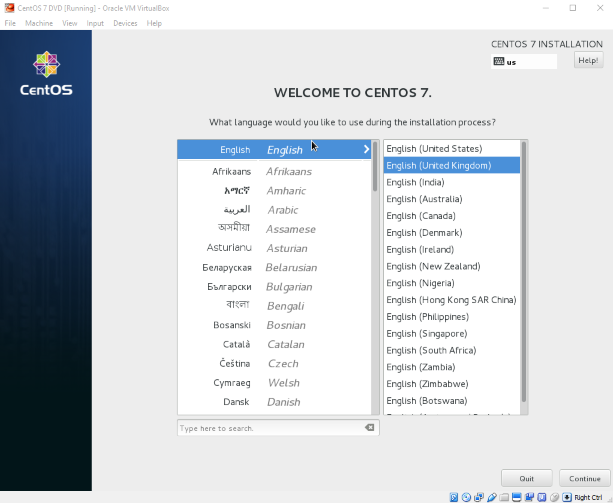
Follow the installation instructions, select language:
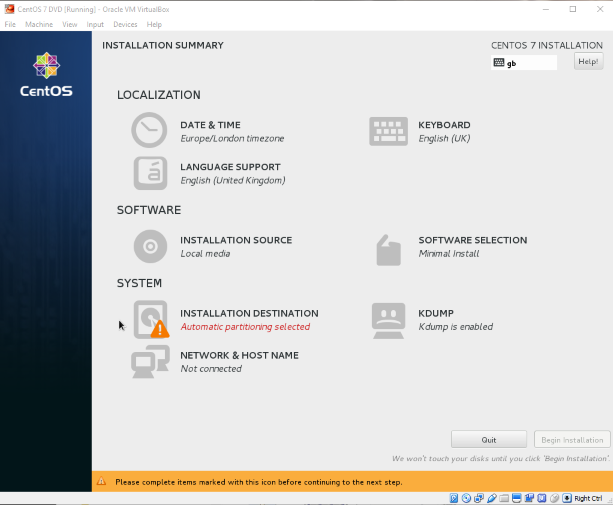
The installation destination needs to be confirmed. Select Installation Destination:
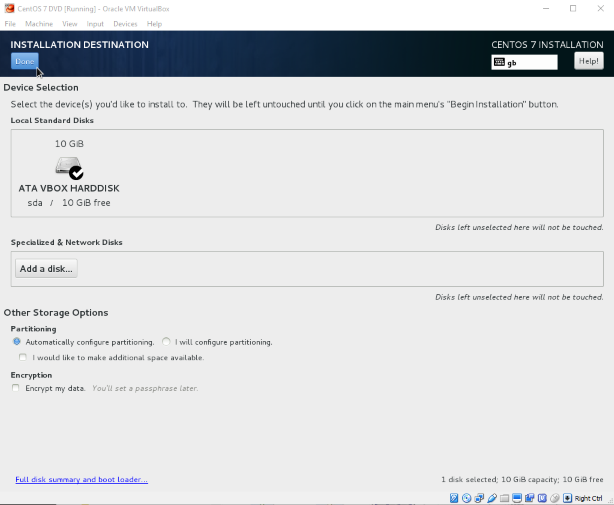
Select the disk for the CentOS 7 installation. For the VM this is the VBOX HARDISK so just select Done to confirm. Next use the Network and Host Name option to enable the network (scroll down if it is not visible):
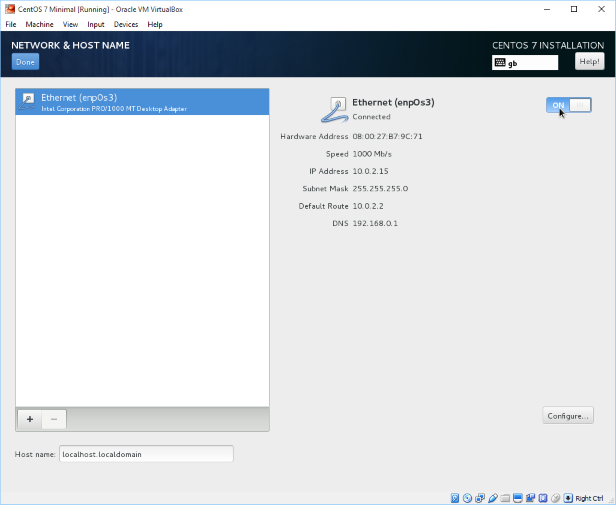
Set the Ethernet to ON and select Done:
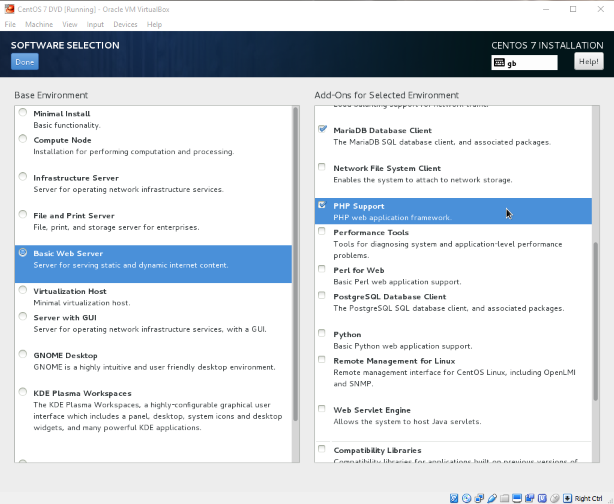
Use the Software Selection option to choose Basic Web Server, selecting any other required packages, e.g. PHP Support, select Done when the required packages have been checked:
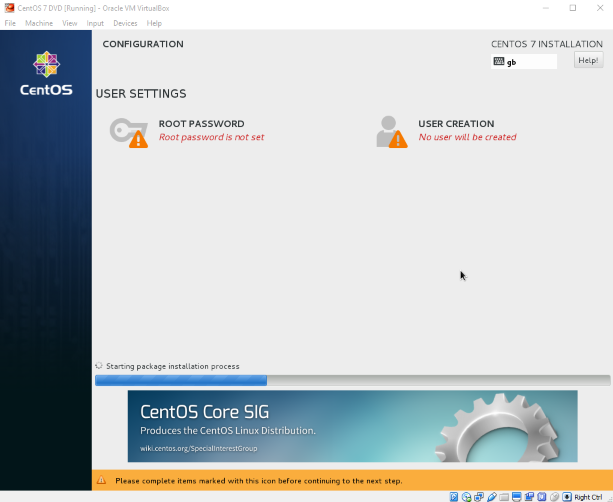
Select Begin Installation, while the system is being copied to the hard disk set up the Root Password:
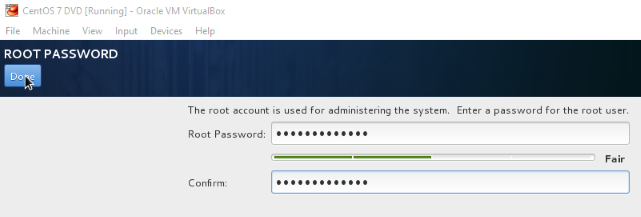
Choose a strong password and press Done. Use Finish Configuration to complete the CentOS installation phase and select reboot. CentOS is now ready for login.
Open Port 80 on CentOS 7 Using the Firewall Daemon
CentOS 7 uses firewalld to control port access. The firewalld process is a "dynamic firewall daemon", i.e. it allows changes to be made without affecting the currently running processes. The firewalld rules are stored in zones. The default zone on installation is public. To allow TCP traffic on port 80 in CentOS 7 enter this firewalld command:
[root@testserver ~]# firewall-cmd --zone=public --add-port=80/tcp --permanentThen reload the firewalld rules:
[root@testserver ~]# firewall-cmd --reloadFor more detailed information on the Firewall Daemon see Using Firewalls at Red Hat. Now start Apache:
[root@testserver ~]# apachectl startThe command service httpd start will also start httpd. If the server is rebooted then Apache will need restarting. To automatically have Apache restart on reboot use the chkconfig utility (CentOS 6) or systemctl (CentOS 7). CentOS 7 command to enable httpd on boot:
[root@testserver ~]# systemctl enable httpd.service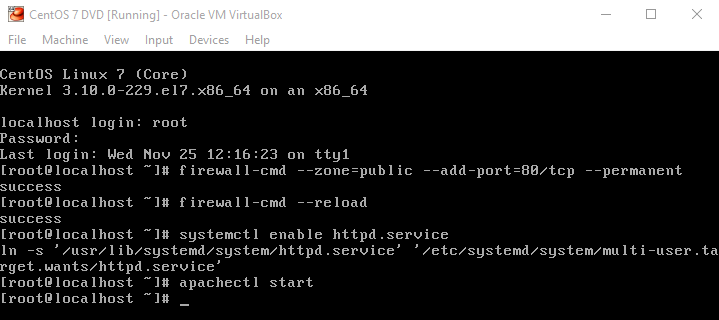
Apache is now running and ready to server web pages. For the VirtualBox VM Network Address Translation (NAT) can be used to test on the local machine.
Port Forwarding for Local VM Testing
For testing the CentOS 7 web hosting VM on the local machine Port Forwarding can be used. This allows a web request on the real machine to be forwarded to a default port on the VM. First configure a port forwarding rule for the VM. Select the VM's Settings and then Network;
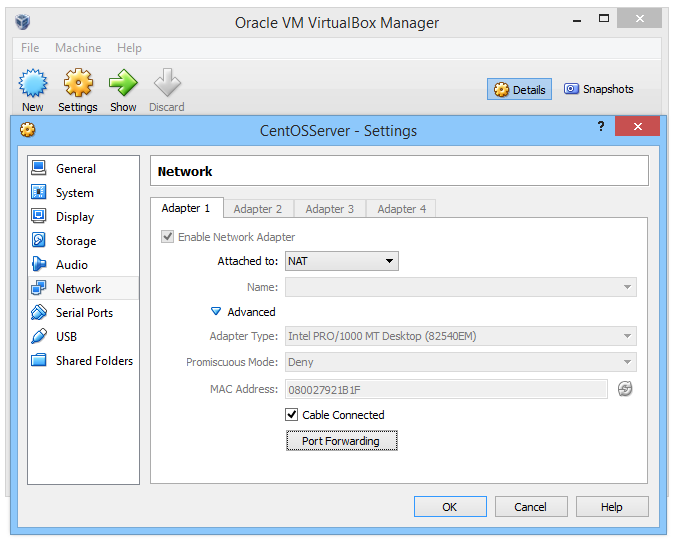
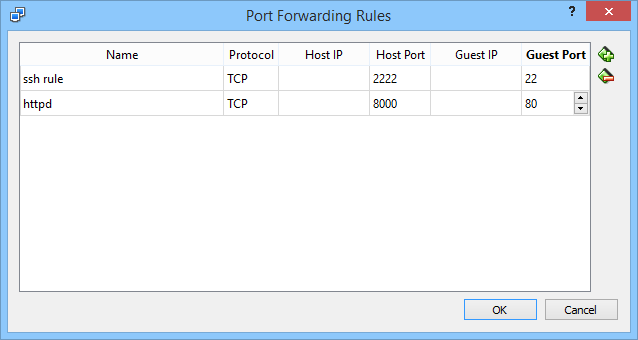
Select Port Forwarding, us the plus (+) icon to add a new rule. Give the rule a name, here httpd was used. This example will forward port 8000 on the PC, i.e. the _HostPort, to the standard port 80 for web serving on the VM, the Guest Port:
Close the dilogs using the OK buttons and use the PC's web browser to check that Apache is running on the VM. Enter the address localhost:8000:
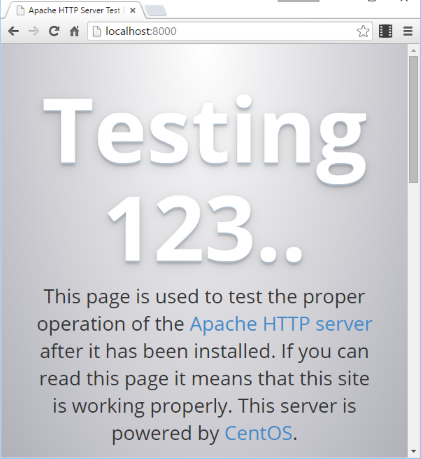
Apache is ready to server web content. For simple websites the ↓markdown↓ Content Management System (CMS) is a great way to server web pages.
See Also
- Setting up a database server, CentOS PHP MariaDB Example for Testing.
- See how to build a website from scratch with ↓markdown↓ CMS.
Author:Daniel S. Fowler Published: Updated:


