HTML5 in Android App for WebView Display
To display lots of informational text and images in an Android app using HTML is a good choice. This article shows how to use HTML5 in Android using a simple example. The HTML file can be created in the Studio editor, or created outside Studio and then copied into the project. The file is placed into the assets folder. An app with a WebView loads the HTML using the Uniform Resource Identifier (URI) file:///android_asset/file.html, where file.html is the created file.

What is HTML?
HTML stands for HyperText Markup Language and is used to display web pages. Modern HTML is often referred to as HTML5, although the World Wide Web Consortium (W3C), who manage web standards, currently have a HTML specification at version 5.2 (as of December 2017). The WHATWG group prefer to keep a rolling specification of HTML. This HTML Living Standard reflects how HTML is (or should be) implemented in the wide variety of available browsers. HTML can be enhanced by applying CSS (Cascading Style Sheets).
Load HTML Page Saved in Android Project
Although this tutorial will be loading a static HTML file, the WebView can also display dynamic HTML by using JavaScript and the Document Object Model (DOM). The combination of HTML for page elements and structure, CSS for formatting, DOM to access the structure, and JavaScript for manipulation makes the WebView a powerful component for displaying large amounts of text and images in an App.
(This Android HTML loading tutorial assumes that Android Studio is installed, a basic app can be created and run, and the code in this article can be correctly copied into Android Studio. The example code can be changed to meet your own requirements. When entering code in Studio add import statements when prompted by pressing Alt-Enter.)
Create Files for HTML5 in Android App Example
For this tutorial the app is called Show HTML. In Studio a new file is created in the app's assets directory (src/main/assets in the project). To create an assets folder highlight the app in the Project explorer. Then use the context (normally right-click) or the File menu. Select New then Folder, then Assets Folder. In the New Android Component dialog the Target Source Set is left at main, then click Finish.
With the assets folder selected use the File or context menu to select New and then File. Here the file is called crocodile.html. Enter the required HTML. (To see the basic structure of a HTML document look at the article Hello World in HTML.) In this tutorial the text used is a poem by Lewis Carroll from the book Alice’s Adventures in Wonderland. Any text can be used. The image of a crocodile was from openclipart and is in the Public Domain. Save this crocodile image into the assets directory as crocodile.png. (Note, Android Studio supports drag-and-drop from the file system if it is downloaded to a different location).

Here is the full text for this HTML example:
<!DOCTYPE html>
<html>
    <head>
        <title>Basic Web Page</title>
    </head>
    <body>
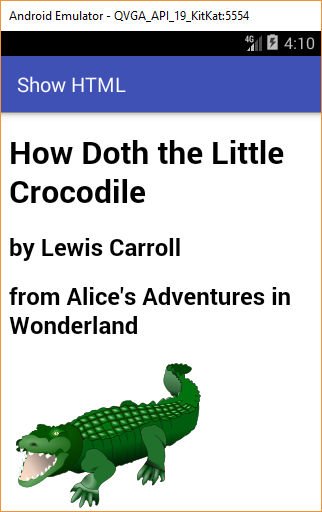
        <h1>How Doth the Little Crocodile</h1>
        <h2>by Lewis Carroll</h2>
        <h2>from Alice's Adventures in Wonderland</h2>
        <img alt="A green crocodile." src="crocodile.png"/>
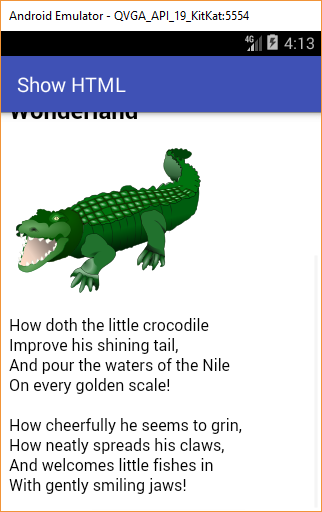
        <p>How doth the little crocodile<br/>
            Improve his shining tail,<br/>
            And pour the waters of the Nile<br/>
            On every golden scale!<br/>
            <br/>
            How cheerfully he seems to grin,<br/>
            How neatly spreads his claws,<br/>
            And welcomes little fishes in<br/>
            With gently smiling jaws!</p>
    </body>
</html>
Open the app’s default layout file, here called activity_main.xml, add a WebView. If using the graphical designer ensure it fills most of the screen. Here’s a simple layout that can be used:
<?xml version="1.0" encoding="utf-8"?>
<RelativeLayout xmlns:android="http://schemas.android.com/apk/res/android"
    xmlns:app="http://schemas.android.com/apk/res-auto"
    xmlns:tools="http://schemas.android.com/tools"
    android:layout_width="match_parent"
    android:layout_height="match_parent"
    tools:context="com.example.showhtml.MainActivity">
    <WebView
        android:id="@+id/webView1"
        android:layout_width="match_parent"
        android:layout_height="match_parent"/>
</RelativeLayout>
With the HTML files and layout ready, only the code to load the files is required. The usual findViewById method is used to get a reference to the WebView. Then the loadUrl method of the WebView is used and passed the name of the HTML file. The name is appended to file:///android_asset/. Note, it is the singular asset and not the same as the directory, which is plural and called assets. Think of it as you save many assets in the directory but only load one asset to display. Open the Java class file for the activity, here called MainActivity.java. Add these two lines of code to the default generated onCreate method:
WebView myWebView = (WebView) findViewById(R.id.webView1);
myWebView.loadUrl("file:///android_asset/crocodile.html");
Here's the app in action:

Once advantage of the WebView is that it supports scrolling if the page does not fit in the entire display:

Here is the full Java code from the MainActivity.java used in this tutorial:
package com.example.showhtml;

import android.app.Activity;
import android.os.Bundle;
import android.webkit.WebView;

public class MainActivity extends Activity {

    @Override
    protected void onCreate(Bundle savedInstanceState) {
        super.onCreate(savedInstanceState);
        setContentView(R.layout.activity_main);
        //Load WebView with HTML from Assets folder
        WebView myWebView = (WebView) findViewById(R.id.webView1);
        myWebView.loadUrl("file:///android_asset/crocodile.html");
    }
}
For further information on the WebView, for example turning on JavaScript support, see the Android docs.
For more information on HTML5 the Mozilla Foundation have some good references.
Acknowledgements
Crocodile image created by openclipart user frankes.
See Also
- Download the code for this example, available in show-html.zip
- See the Android Studio example projects to learn Android app programming.
- For a full list of all the articles in Tek Eye see the full site Index.
Archived Comments
Techapps on August 24, 2015 at 12:37 am said:
Hello, First of all I want to say very thank you for this post I know it is 2 years old post but I cannot found it in my search result and after searching of two weeks I found this great help.
Actually I was looking for something similar but non-tutorial (text-video) to help me out, but your post did.
But I'm still one step far from what I want. I have a complete file with folders of images, js and css etc. which is linked with index.html file.
So, if you can help me out with how to link multiple html, css, javascript, and image files it will be great help.
Thank you so much again!
Author:Daniel S. Fowler Published: Updated:


