Web Search Example In Android
Being able to search the whole world for information is one reason why we use the Internet. After all it is the World Wide Web. The Android Operating System has web search built into it. Using an Android ACTION_WEB_SEARCH Intent a web search can be started from inside an app.

(This Android web search tutorial assumes that Android Studio is installed, a basic App can be created and run, and the code in this article can be correctly copied into Android Studio. The example code can be changed to meet your own requirements. When entering code in Studio add import statements when prompted by pressing Alt-Enter.)
Putting a Web Search Button in Your App
In this Android web search example an ACTION_WEB_SEARCH Intent is started from a button. This allows an Activity to have a web search button, in this case with the usual magnifying glass icon. This tutorial covers adding a simple Internet search. If functionality is required to search for items within your app (such as the database) see the Android Developers Search Overview page.

The User Interface Design
For this simple Internet search button tutorial the user interface (UI) is an EditText (for the search term) and an ImageButton (to start the search). The ImageButton has a magnifying glass icon from a vector image from openclipart.org (a good source of free vector images). See the tutorial Free Android Icons Using OpenClipArt.org and Paint.NET on how to convert a vector image to the Portable Network Graphics (PNG) formats required for Android apps. The image is placed into the res/drawable folders for the app. You can of course use you own image for the button or use a simple text Button. The magnifying glass icon is available from the Tek Eye Android free resources page, use the magglass.zip file if required.
Create a New App Project
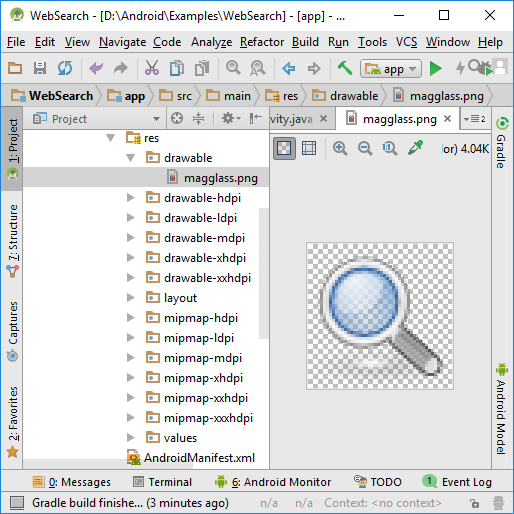
In Android Studio start are new project, here it is called Web Search and uses an Empty Activity with all other starting values left at their default values. Add the icon files for the search button to the res folder. When copied into the correct directory Studio will list them in the Project explorer (or use Synchronize to refresh the project tree).

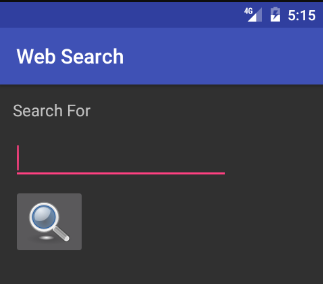
The app screen (here called activity_main) is opened in Design mode. The existing TextView is used as a label. It is positioned at the top left of the screen. Using the Properties list the text is changed from Hello World! to Search For. The textSize is set to 16sp.
From the Palette a Plain Text (from the Text widgets) is dropped on to the screen below the label. This is an EditText and the default Name text is cleared with the inputType set to just text. Finally an ImageButton is dropped below the EditText from the Palette (found under Images), when the Resources dialog appears the magglass drawable is chosen (or whatever image you have used).

The activity_main.xml code should look similar to this:
<?xml version="1.0" encoding="utf-8"?>
<android.support.constraint.ConstraintLayout xmlns:android="http://schemas.android.com/apk/res/android"
    xmlns:app="http://schemas.android.com/apk/res-auto"
    xmlns:tools="http://schemas.android.com/tools"
    android:layout_width="match_parent"
    android:layout_height="match_parent"
    tools:context="com.example.websearch.MainActivity">

    <TextView
        android:id="@+id/textView"
        android:layout_width="wrap_content"
        android:layout_height="wrap_content"
        android:text="Search For"
        android:textSize="16sp"
        app:layout_constraintBottom_toBottomOf="parent"
        app:layout_constraintHorizontal_bias="0.032"
        app:layout_constraintLeft_toLeftOf="parent"
        app:layout_constraintRight_toRightOf="parent"
        app:layout_constraintTop_toTopOf="parent"
        app:layout_constraintVertical_bias="0.032" />

    <EditText
        android:id="@+id/editText"
        android:layout_width="wrap_content"
        android:layout_height="wrap_content"
        android:layout_marginLeft="0dp"
        android:layout_marginStart="0dp"
        android:layout_marginTop="14dp"
        android:ems="10"
        android:inputType="text"
        app:layout_constraintLeft_toLeftOf="@+id/textView"
        app:layout_constraintTop_toBottomOf="@+id/textView" />

    <ImageButton
        android:id="@+id/imageButton"
        android:layout_width="wrap_content"
        android:layout_height="wrap_content"
        android:layout_marginLeft="8dp"
        android:layout_marginStart="0dp"
        android:layout_marginTop="6dp"
        android:contentDescription="Magnifying Glass"
        app:layout_constraintLeft_toLeftOf="@+id/editText"
        app:layout_constraintTop_toBottomOf="@+id/editText"
        app:srcCompat="@drawable/magglass" />

</android.support.constraint.ConstraintLayout>
Performing the Search
One of the advantages of using Android is the ability to reuse functionality from within an app without being tied to specific versions of libraries or programs. This is achieved via the Intent mechanism. Intents can reduce the amount of code to be written if that code already exists. For an Internet search the Android platform supports an Intent of type ACTION_WEB_SEARCH. Here the search term is taken from the EditText and loaded into the Intent. The Intent is then passed to Android, via startActivity(), to do the browser based search. Here is the code in an onClick that will be linked to the ImageButton (imports for View, EditText, Intent and SearchManager will be required).
public void onClick(View arg0) {
    String searchFor=((EditText) findViewById(R.id.editText)).getText().toString();
    Intent viewSearch = new Intent(Intent.ACTION_WEB_SEARCH);
    viewSearch.putExtra(SearchManager.QUERY, searchFor);
    startActivity(viewSearch);
}
Add the Code to Handle the Button Press
The code to watch for button presses is added by linking an OnClickListener instance to the ImageButton. There are several ways to do this, see the article Different Ways to Code Android Event Listeners. Here is the code for this example web search app.
package com.example.websearch;

import android.app.SearchManager;
import android.content.Intent;
import android.support.v7.app.AppCompatActivity;
import android.os.Bundle;
import android.view.View;
import android.widget.EditText;

public class MainActivity extends AppCompatActivity {

    @Override
    protected void onCreate(Bundle savedInstanceState) {
        super.onCreate(savedInstanceState);
        setContentView(R.layout.activity_main);
        //attach an instance of HandleClick to the Button
        findViewById(R.id.imageButton).setOnClickListener(new HandleClick());
    }
    private class HandleClick implements View.OnClickListener {
        public void onClick(View arg0) {
            String searchFor = ((EditText) findViewById(R.id.editText)).getText().toString();
            Intent viewSearch = new Intent(Intent.ACTION_WEB_SEARCH);
            viewSearch.putExtra(SearchManager.QUERY, searchFor);
            startActivity(viewSearch);
        }
    }
}
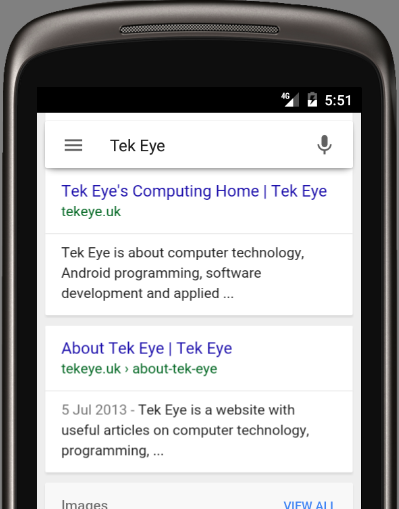
This screenshot shows the result of entering Tek Eye in the EditText and pressing the ImageButton. The code for this example is available in websearch.zip and from our Android Example Projects page.

Styling the ImageButton with a Shape Drawable
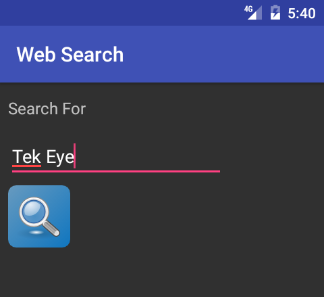
By Default the magnifying glass image appears to sit directly on the Activity's background. It can be given the appearance of a button by using a shape drawable. See the article ImageButton Background with Shape Drawable for full details. With the drawable folder selected bring up the context menu (usually right-click) or use the File menu. Select New then File, call it button_background.xml. By setting appropriate gradient, padding and corners elements on a shape and assigning it to the background attribute for the ImageButton the magnifying glass image can have a rounded button appearance. Add the following shape code to background_button.xml.
<?xml version="1.0" encoding="utf-8"?>
<shape xmlns:android="http://schemas.android.com/apk/res/android" >
    <gradient android:startColor="#B07FC9FF"
        android:endColor="#B00094FF"
        android:angle="315"/>
    <padding android:left="7dp"
        android:top="7dp"
        android:right="7dp"
        android:bottom="7dp" />
    <corners android:radius="8dp" />
</shape>
The background attribute for the ImageButton is then set to @drawable/button_background.

Experiment with the shape elements to see the effect on the ImageButton appearance, e.g. remove the padding element.
See Also
- Download the code for this example, available in websearch.zip
- Android Example Projects
- Free Launcher Icons, Menu Icons and Android Graphics
Archived Comments
devel on May 25, 2012 at 4:38 pm said: Good post. I can add it to my Android app.
Author:Daniel S. Fowler Published: Updated:


