Setup WordPress on CentOS 7 for a Website
This tutorial covers setting up WordPress on a CentOS 7 system. WordPress is a Content Management System (CMS) that is used to make it easy to publish and maintain a website. WordPress is the most popular of the CMSs and is used in 43% of the world's websites and dominates the CMS market with over 63% market share. You can setup WordPress locally using a virtual machine for testing. To install WordPress locally on Windows to duplicate a remote server use virtualization software, such as VirtualBox.

The popularity of WordPress means that nearly all web hosting providers support it and provide easy install options. The control panel for the web hosting service normally has an option to install WordPress. If not a manual install is usually straightforward. A web hosting company will normally have online help to show how to setup WordPress on their hosting plans. For a self-managed dedicated server or Virtual Private Server (VPS) the setup requires several steps to be completed. In this article, WordPress is setup on a CentOS 7 system using a VirtualBox virtual machine (VM) for testing purposes. A test setup replicating a live server allows changes to be tried out before deployment. Similar steps apply to the setup of WordPress on a live VPS or dedicated server.

WordPress Pre-Setup Requirements
Before installing WordPress on a CentOS 7 VM, VPS or dedicated server ensure that the CentOS system is ready. This requires that the CentOS system has a web server running, normally Apache, it has PHP installed and working, and it has a database server running, normally MySQL or MariaDB. This is called a LAMP stack with LAMP standing for Linux Apache MySQL PHP. Here CentOS is the GNU/Linux being used. See the following articles if you need to configure Apache, MySQL and PHP:
- For a CentOS minimal install see Install Apache on CentOS to Configure VPS Test System.
- For PHP on a CentOS minimal install see Install PHP on CentOS VPS for Apache Hosted Web Sites.
- If using the CentOS DVD download see Setup CentOS Server for Web Hosting with DVD ISO.
- To configure MariaDB (MySQL) on CentOS see CentOS PHP MariaDB Example for Testing.
WordPress also requires the support of URL rewriting in the Apache .htaccess files. This ensures that the web address a visitor types into a browser gets correctly processed by WordPress. Recent versions of Apache turn off running rules in .htaccess files. See this article:
For a CentOS 7 VM, VPS or dedicated server it is assumed that command line (shell) access is available, usually via SSH. An example of using SSH to access a minimal CentOS 7 VM is covered in this article:
Prepare MySQL/MariaDB for WordPress
WordPress will require a database name, a user name for the database, and a secure password. Think about the values to use. For this article the values are:
- Database name = wpdb
- Wordpress database user name = wpdbadmin
- Wordpress database password = wppw2015 (not very secure so choose your own longer password)
Login to the web serve and run the mysql utility, using the database root password:
# mysql -u root -pCreate the WordPress database:
> CREATE DATABASE wpdb;Create the WordPress database user:
> CREATE USER wpdbadmin@localhost IDENTIFIED BY "wppw2015";Give the WordPress user name access to the WordPress database then flush and exit the MySQL utility:
> GRANT ALL PRIVILEGES ON wpdb.* TO wpdbadmin@localhost;
> FLUSH PRIVILEGES;
> EXIT
Get the WordPress Files
Here the default Apache public web folder is used. If another directory has been configured for the web site use that directory. Change to the directory that will hold the web files:
# cd /var/www/htmlGet the compressed WordPress files (if wget is not installed then get it with yum install wget):
# wget http://wordpress.org/latest.tar.gzExtract the WordPress files from the wordpress folder in the download:
# tar -xzvf latest.tar.gz --strip-components=1Rename the configuration file from wp-config-sample.php to wp-config.php:
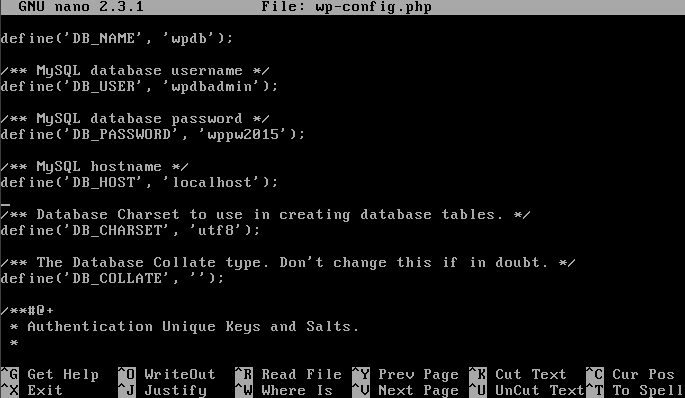
# mv wp-config-sample.php wp-config.phpEdit the wp-config.php in vi or nano to set the correct database values:
# vi wp-config.php(For vi use i to enter insert mode and escape to leave it. Use :wq to write the file and quit.) Or:
# nano wp-config.php(Ctrl-O writes the file and Ctrl-X exits in nano.) Change the database entries for DB_NAME, DB_USER, DB_PASSWORD.

Now point the browser at the WordPress install.php script in the wp-admin directory, e.g. example.com/wp-admin/install.php. In this tutorial accessing the script in the VM used the address localhost:8000/wp-admin/install.php in the browser. If a page is display with Error establishing a database connection then check the database settings in the wp-config.php file before seeking help on the WordPress installation support forum:

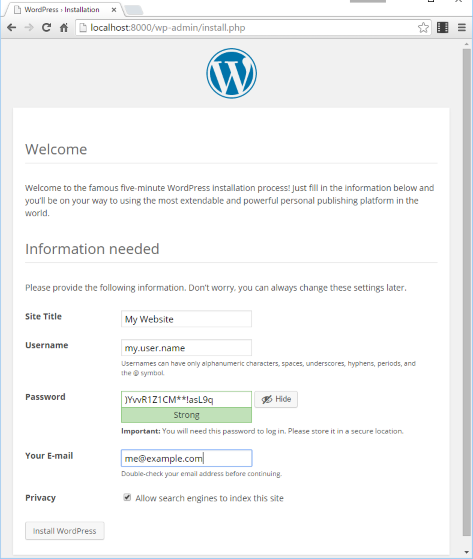
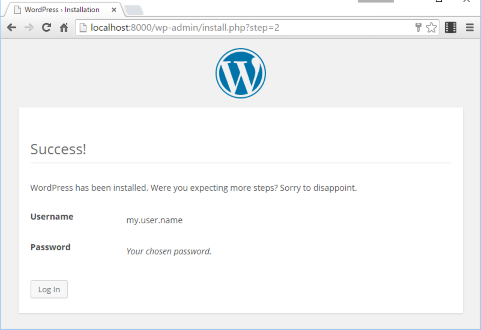
Complete the installation fields for the first administrator of the WordPress based website. Make a note of the details for safe keeping. Click the Install WordPress button and a Success page should display:

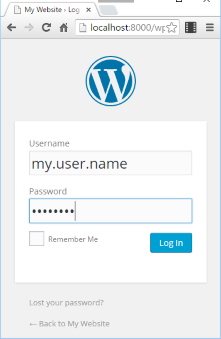
Press the Login button to be taken to the normal WordPress login address, e.g. example.com/wp-login.php or for the VM used here localhost:8000/wp-login.php:

Once logged in to the WordPress dashboard website pages and posts can be created and the website managed.

To configure settings, plugins and allow media (images, videos and audio) to be uploaded to WordPress the ownership of the wp-content directory may need changing. Back in the /var/www/html directory use the chown command to change the ownership on the wp-content folder. Here it is assumed that the default Apache web server install is running under the apache owner and the apache group:
# chown -R apache:apache wp-contentIf you need to check the Apache user:
# ps aux | grep apacheThe user name is in the first column, then use groups:
# groups apache
apache : apache
Alternatively instead of changing the directory owner use weak permissions for testing purposes (not recommended for live servers):
# chmod 777 wp-contentSee Also
- For a list of all the articles in Tek Eye see the full site Index
Author:Daniel S. Fowler Published: Updated:


